 I don’t really understand the phrase, “Easy as pie.” Homemade pie isn’t really that easy. It takes some practice, and it takes TIME. I mostly tend to make graham cracker crust when I make pie because it is tasty, easy, and doesn’t take a lot of time. Pastry crust pies have always been a little more intimidating. The ingredients are simple and straightforward but somehow the actual making of pie always seemed a little difficult.
The pie crust recipe I am sharing today is one I have had good success with. It bakes up flaky and golden brown and gets good reviews from tasters. It does take time, though. It requires chilling between steps and is not going to be able to satisfy a spur-of-the-moment desire for pie. This is a plan ahead recipe. 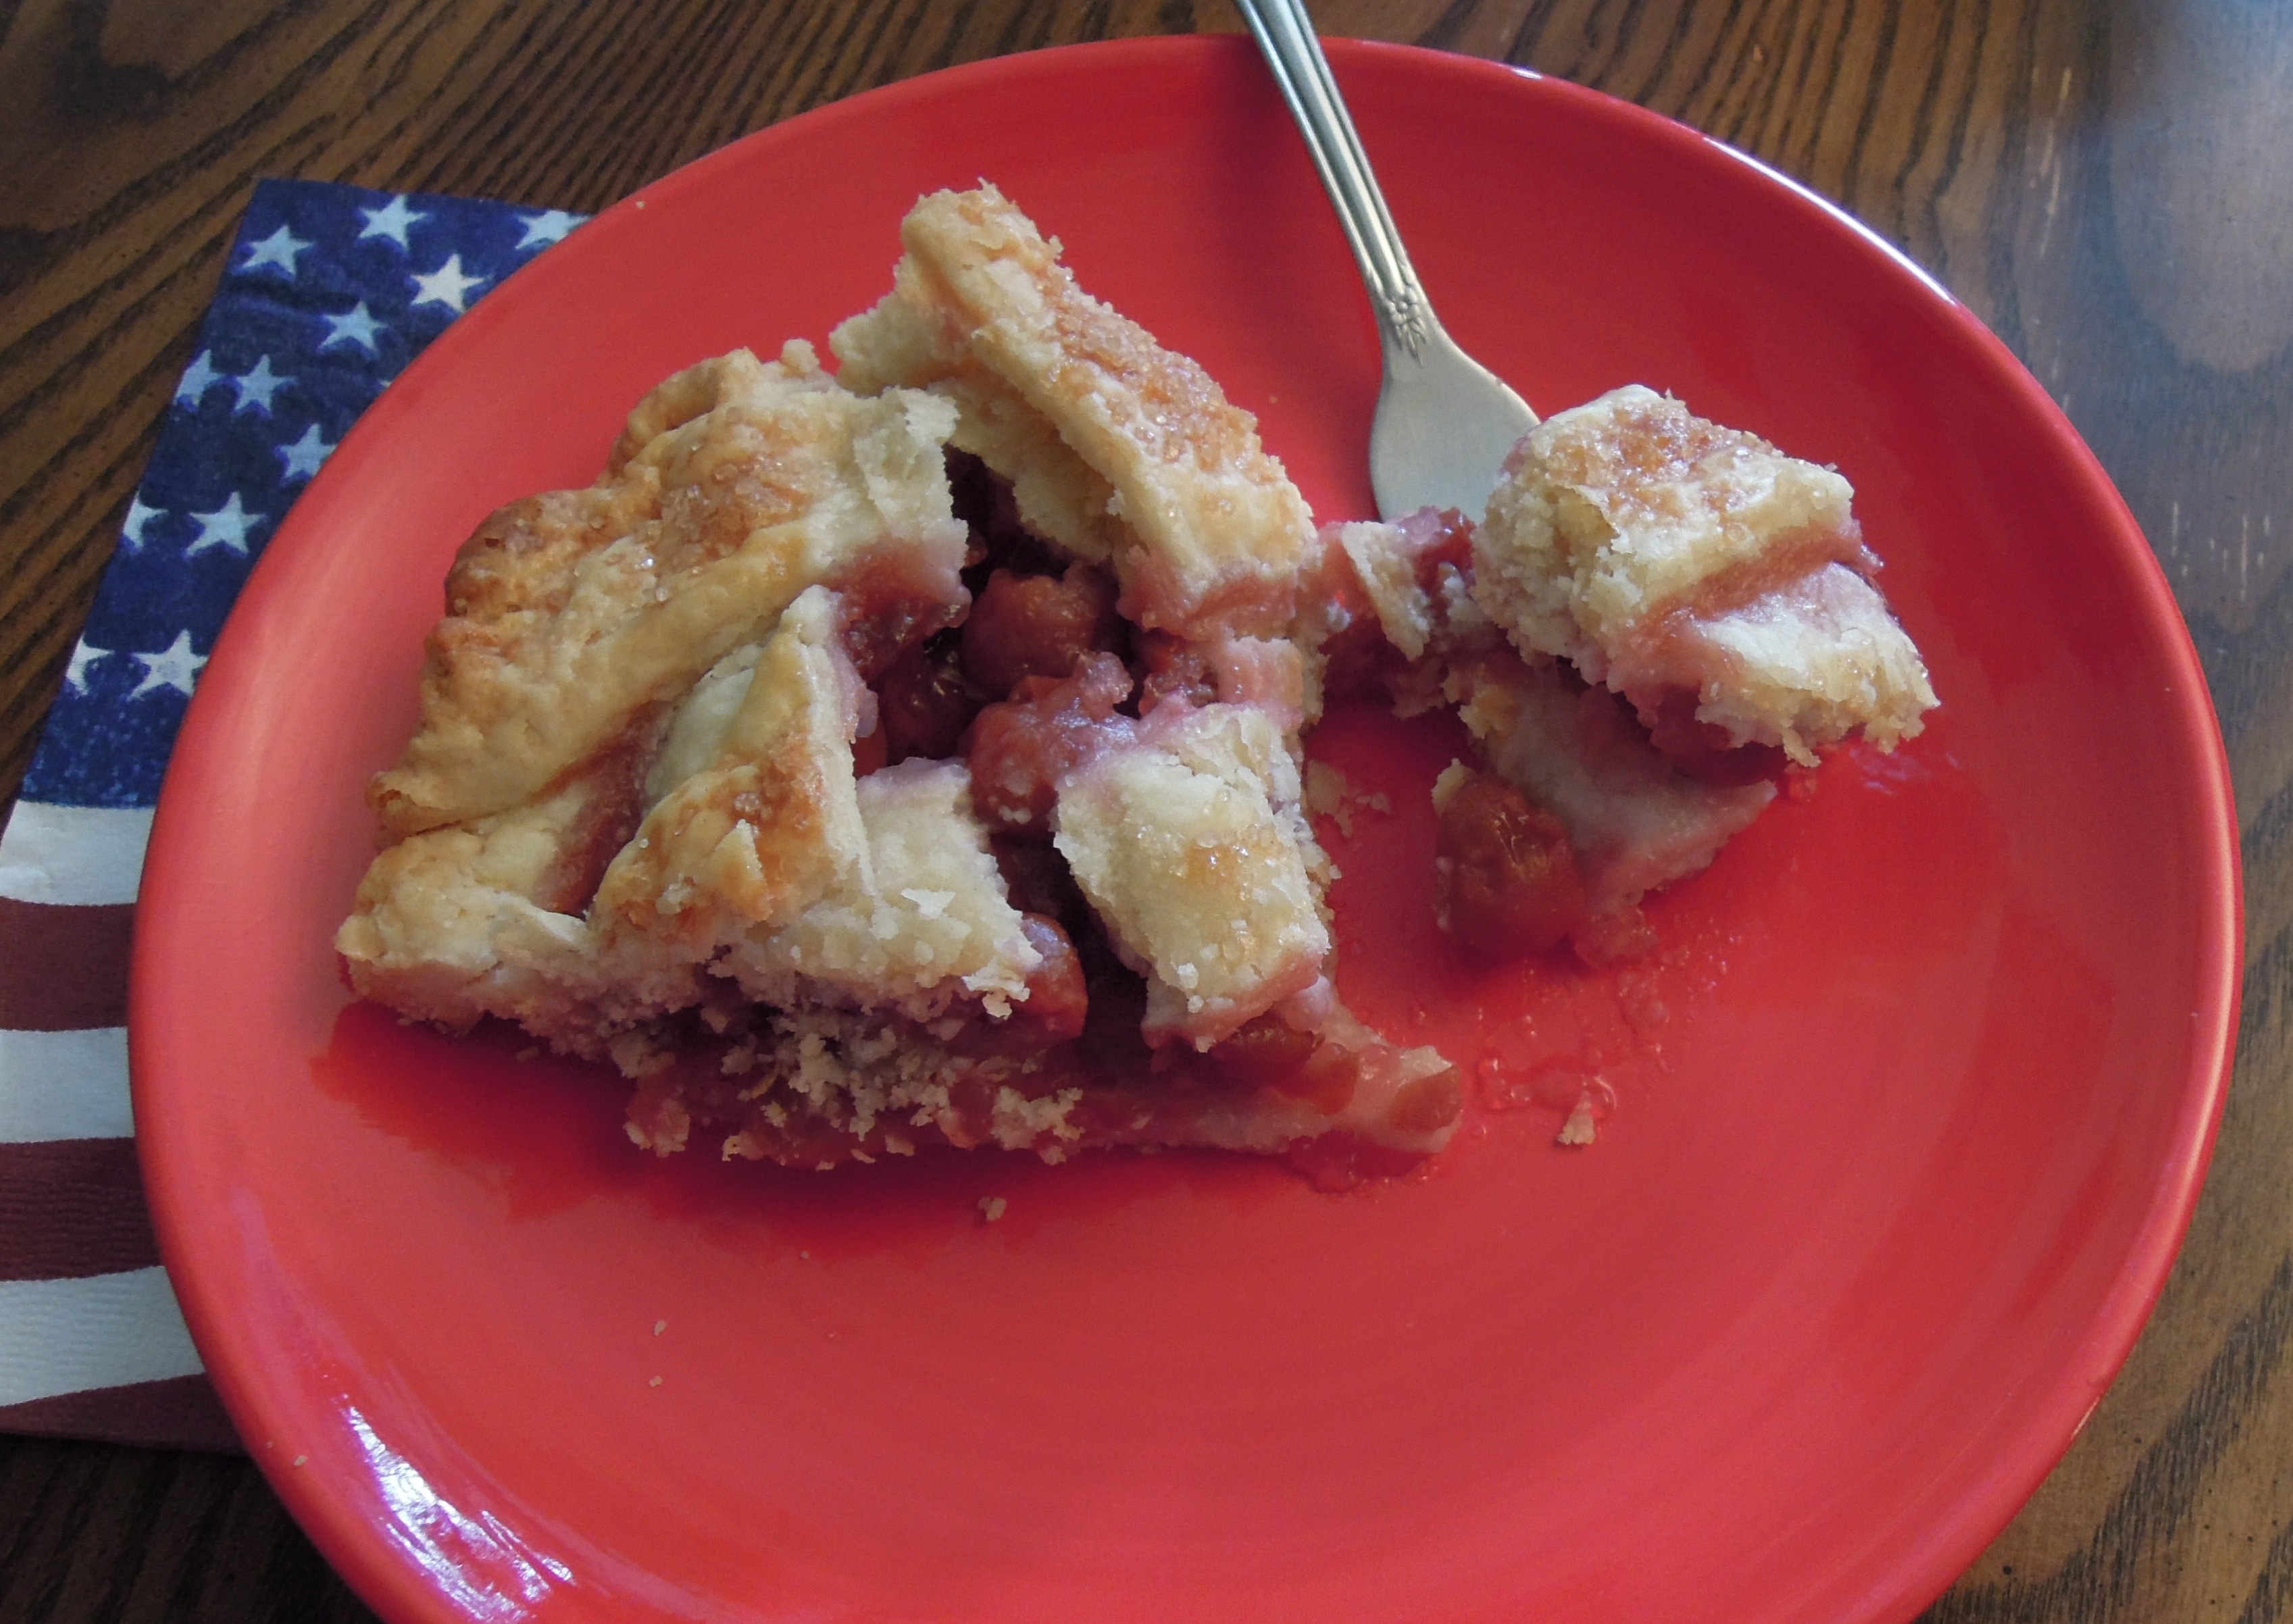 One of the secrets to this crust recipe is vodka. Say what?
Yes, drink lots of vodka while making it, and it won’t seem so bad.
No. Anyone who knows me at all knows that previous statement is false. I wouldn’t be able to choke down a tablespoon of vodka, but a few tablespoons of vodka mixed into the flour and butter mixture of this recipe will work wonders. Water is a necessary ingredient to make rolling the pie crust possible, but too much can make a pie dough develop gluten which makes the crust tough. The people at America’s Test Kitchen figured out that vodka is a great ingredient in pie crust because gluten does not form in ethanol (a primary ingredient in vodka). Using part water and part vodka is the perfect solution. The vodka makes the crust easier to roll out, but it vaporizes in the oven, leaving the crust flaky and delicious.
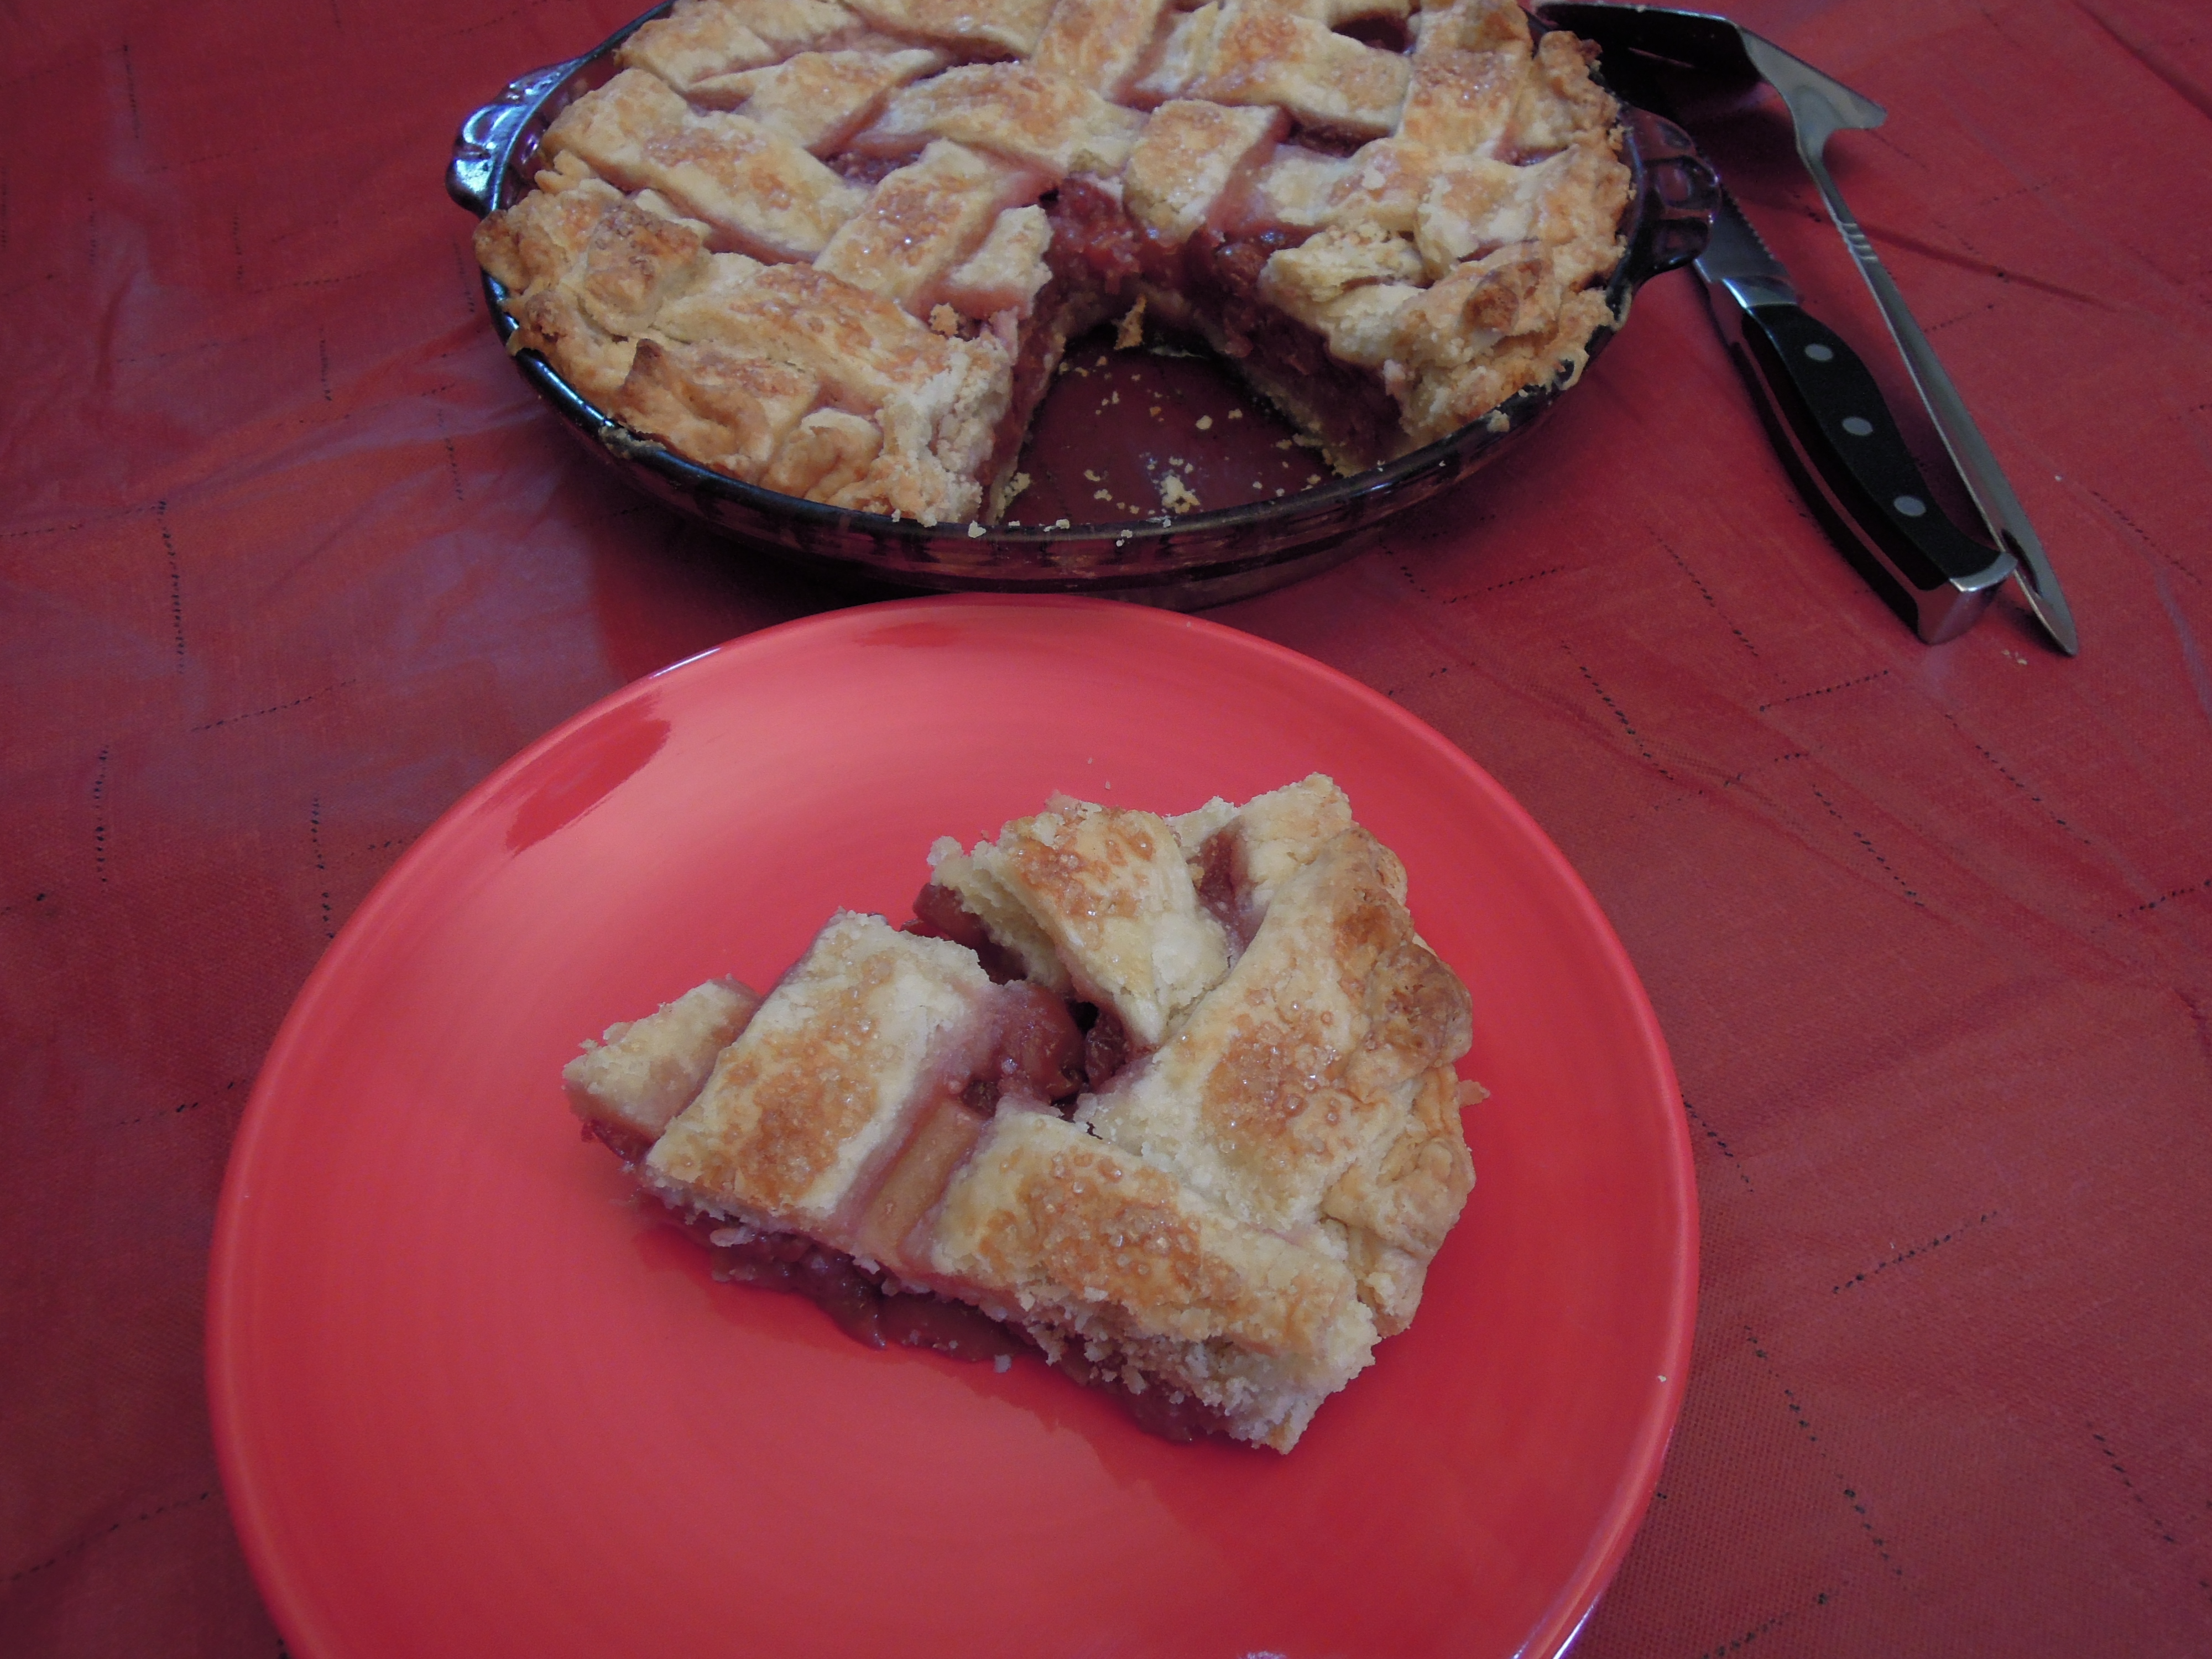
“Can she make a cherry pie, Billy Boy, Billy Boy?” The lyrics of the traditional folk song “Billy Boy” suggest that being able to make a cherry pie is an important quality. Yes, I can make a cherry pie, and so can you–for a summer BBQ or as a great addition to a 4th of July get-together!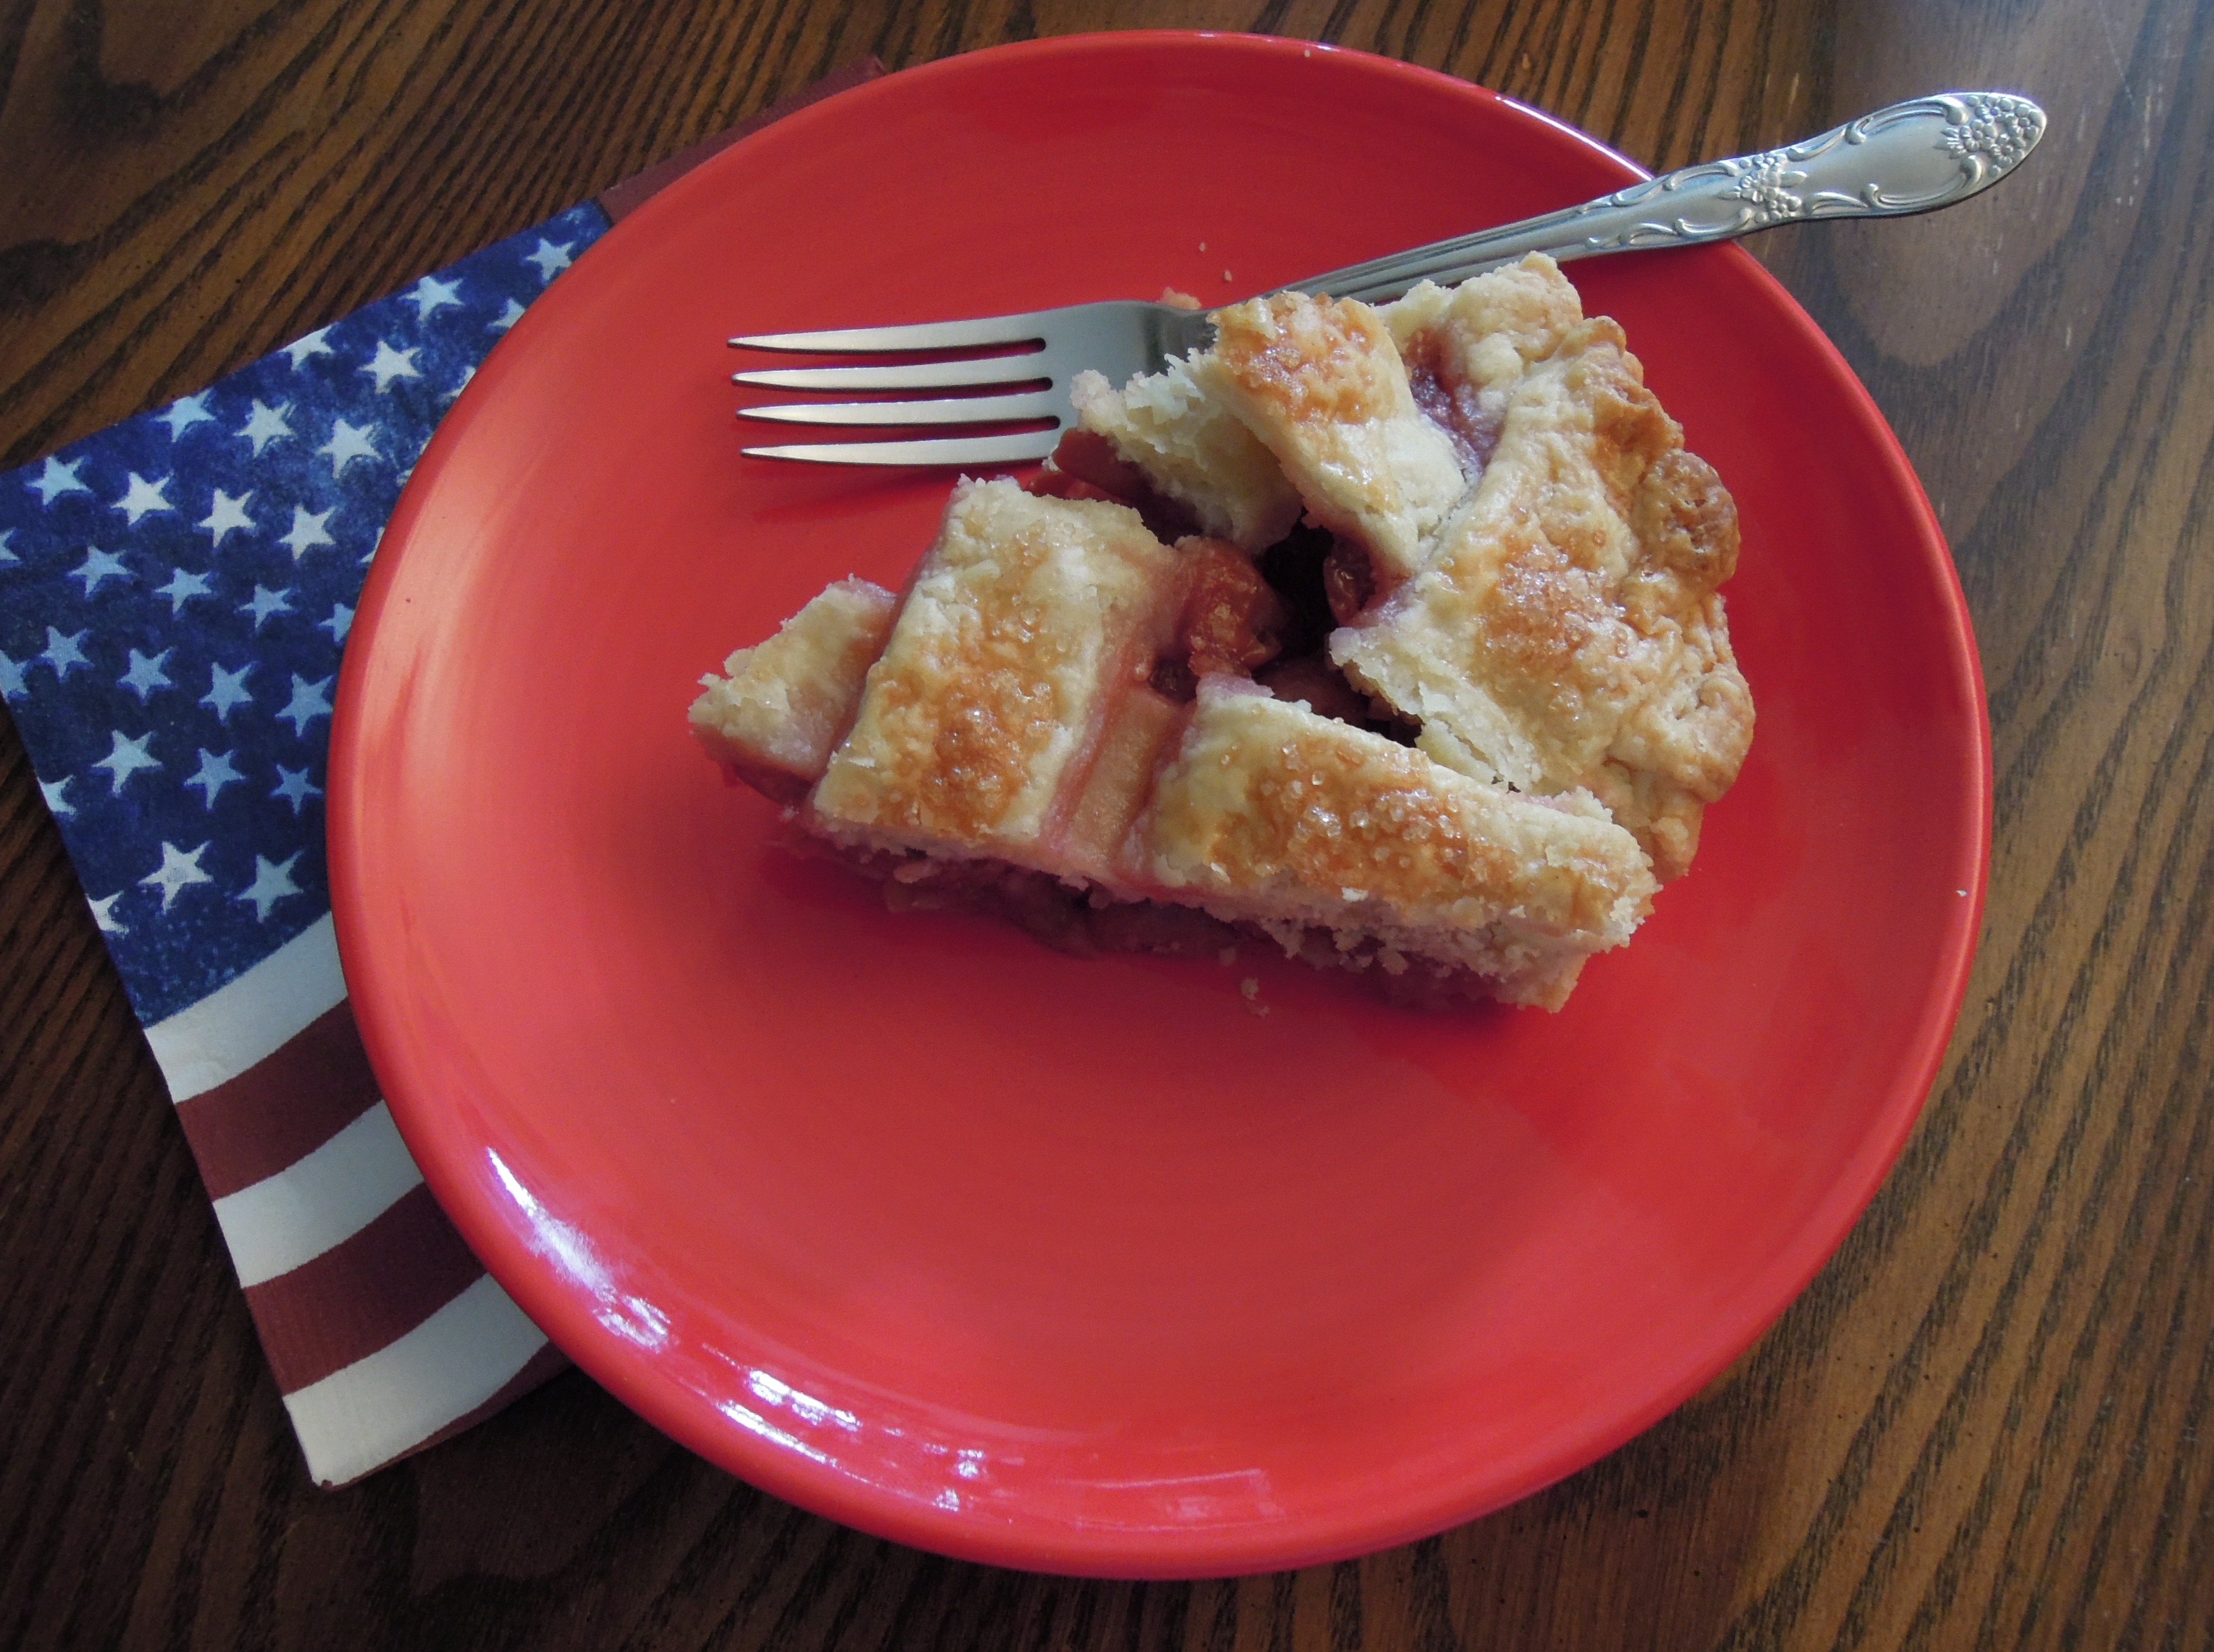
(If you want this to go more quickly, substitute store-bought crust for the homemade crust. The cherry filling takes no time at all.)

Classic Cherry Pie and Homemade Crust
Ingredients:
For the pie crust:
*Keeping the butter chilled is one of the most important elements of good pie crust. You do not want the butter to fully incorporate with the flour. You want some to remain solid throughout the dough. This is what will make flakes when it bakes. Some people chill ALL of the ingredients and equipment to make sure the butter stays as cold as possible.
*Of course, you can substitute pre-made crust to simplify this whole process and cut down significantly on time.
- 2 and 1/2 cups (12.5 ounces) all-purpose flour, divided
- 2 tablespoons sugar
- 1 teaspoon salt
- 12 tablespoons (6 ounces) unsalted butter, cut into 1/4 inch pieces and CHILLED
- 1/2 cup (3.25 ounces) vegetable shortening, cut or divided into pieces and CHILLED
- 1/4 cup vodka, CHILLED
- 1/4 cup water, CHILLED
- Optional: beaten egg white and coarse sugar for topping the crust before baking
For the cherry filling:
- 2-3 (14.5 ounce) cans tart cherries, NOT cherry pie filling (amount will depend on depth and size of pie pan; I used 2 cans)–Look for these on the top shelf with the other canned fruits. Warning: They are pricey.
- 1 slightly heaping cup of white sugar
- 3 tablespoons quick-cooking tapioca
- 2 teaspoons corn starch
- 1/4 teaspoon almond extract
- 1/4 teaspoon salt
- optional: red food coloring
- 1 tablespoon margarine or butter
Directions:
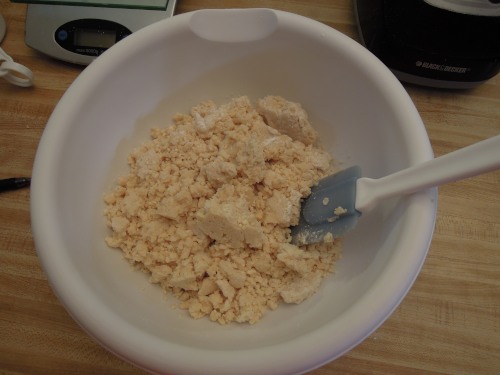
- Make and chill the crust: (Be sure to have chilled the butter, shortening, water, and vodka before beginning.) Process 1 and 1/2 cups of the flour (notice that this is not the full amount listed above), sugar, and salt together in a food processor until combined. Scatter the chilled butter and shortening over the top and continue to process until incorporated and the mixture begins to form uneven clumps with no remaining flour, about 15 seconds.
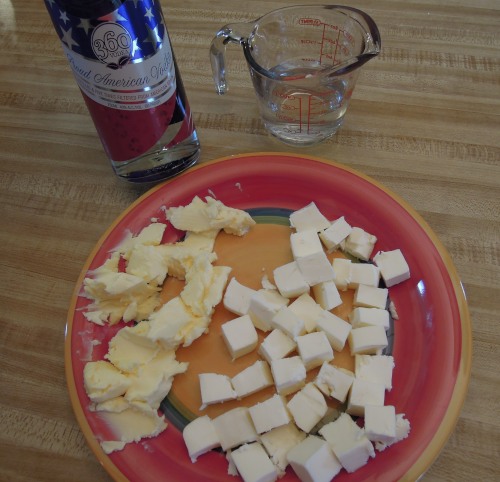
Chill all of these ingredients in advance. 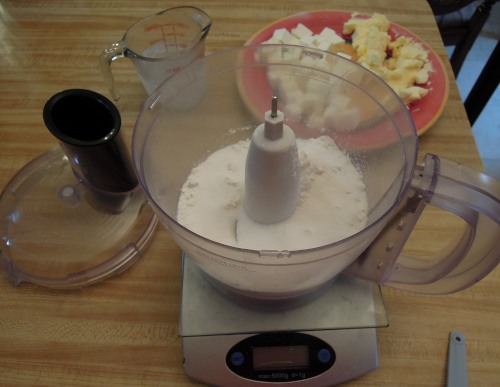
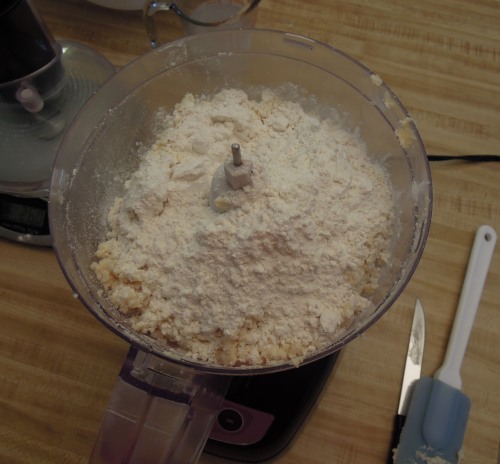
Process the dry ingredients. 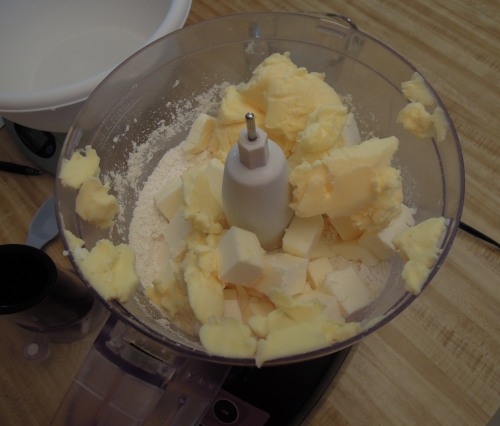
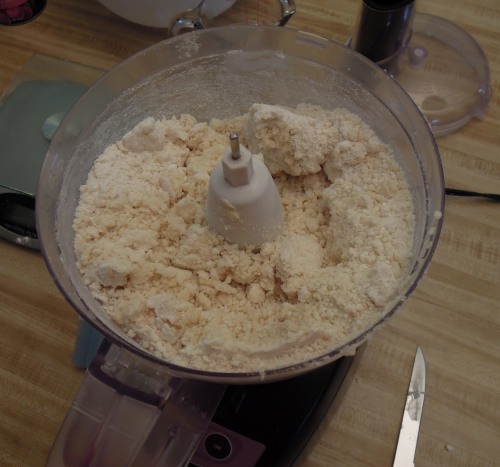
Add chilled butter and shortening. 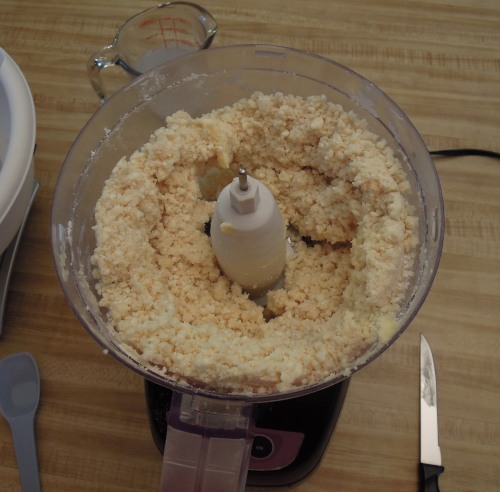
Process. - If needed, scrape down the workbowl and redistribute the dough around the processor blade. Sprinkle the final 1 cup of flour over the dough and pulse until the dough has broken up into pieces and is evenly distributed around the bowl.
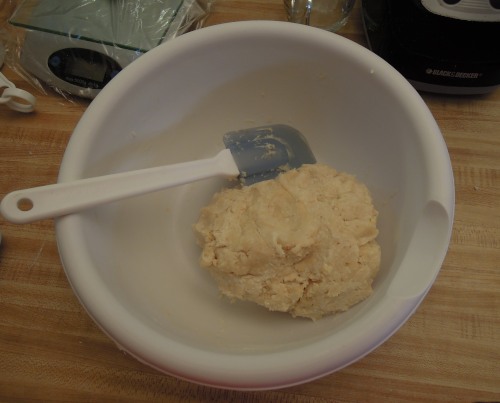
- Transfer the mixture to a medium size mixing bowl. Sprinkle about half of the chilled vodka and water over the mixture. Toss, stir, and press the dough together using a rubber spatula, until the dough sticks together. Add additional water and vodka as needed. (Tip: Minimize handling of the dough to avoid toughness and to avoid warming the butter and shortening it contains.)
- Divide the dough into two even pieces. Press each half into a disk on plastic wrap and wrap tightly. Refrigerate for at least one hour.
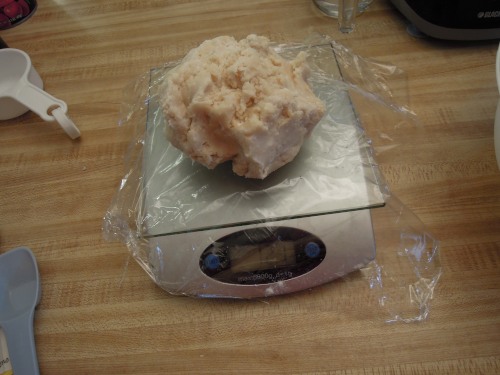
I weigh the dough to ensure even halves. 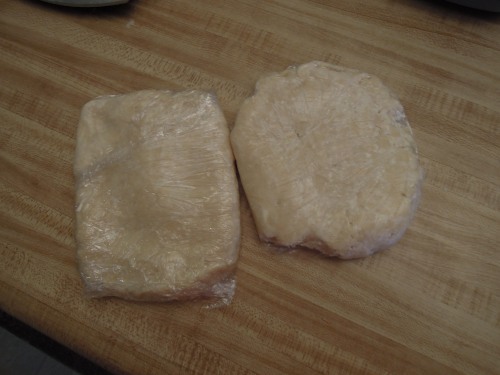
- When dough is chilled, remove one disk from the refrigerator to warm and soften slightly for 10-15 minutes. Roll the disk out to a 12 inch circle on a lightly floured counter. (Tip: This dough is typically a bit wet, so you will want to flour your rolling pin, hands, and counter. Check for dough sticking on the counter and add more flour and turn the dough over as needed.)
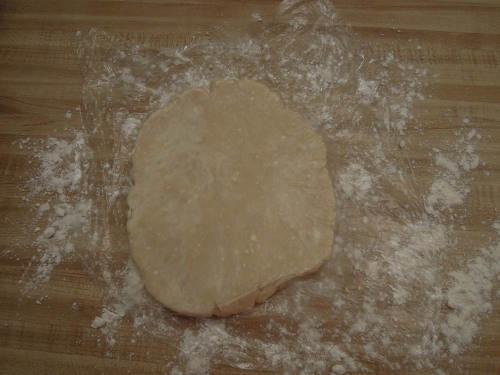
I will often leave the plastic wrap over the dough to minimize sticking. 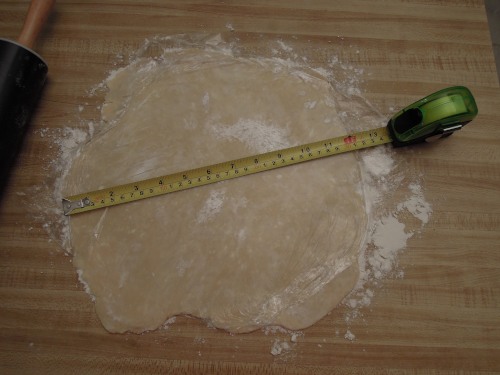
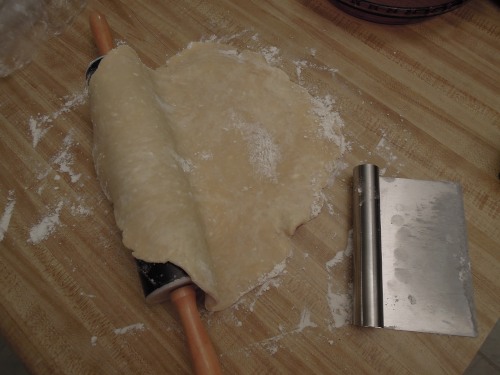
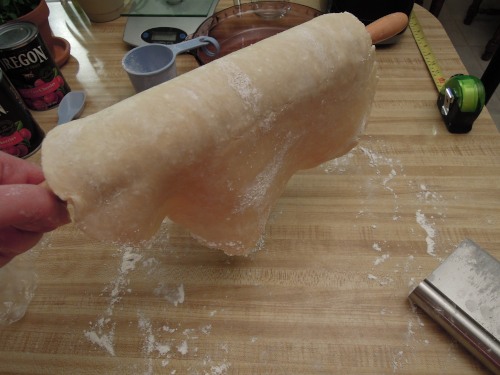
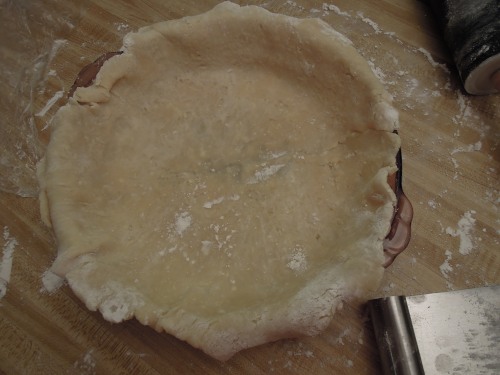
- Once rolled out, lift the dough onto the rolling pin and transfer it to a 9 inch pie plate. Center the dough and gently position it into the bottom of the pie pan with excess hanging over the edges. Cover with plastic wrap and return to the refrigerator to chill for at least 30 minutes.
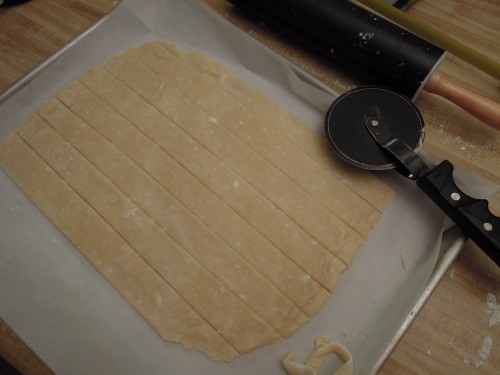
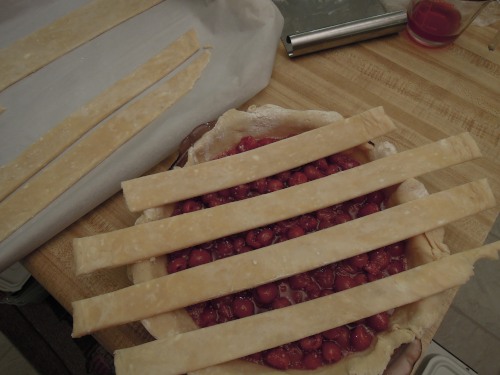
- For a lattice top, remove the other disk of dough from the refrigerator to take the chill off and then roll into a 13 and 1/2 by 10 and 1/2 inch rectangle following the same flouring steps as for the first disk. Transfer the rectangle to a parchment lined baking sheet. Trim the edges of the dough to be even and then cut the rectangle into 8 long strips of even width. Separate the strips slightly and then cover with plastic wrap and freeze for 30 minutes.

- While the dough is chilling, preheat the oven and make the cherry filling. Place an oven rack at the lowest position and then place a foil-lined baking sheet on the rack. Preheat the oven to 425 degrees. (Preheating the baking pan along with the oven will help prevent a soggy bottom crust later.)
- Drain the cans of cherries well, reserving 1/4 cup of the juice. In a medium size bowl, gently mix cherries, juice, sugar, tapioca, corn starch, extract, salt, and food coloring (if using) together. (Tip: I did not use the full 1/4 cup of reserved juice. I added about half of it.)
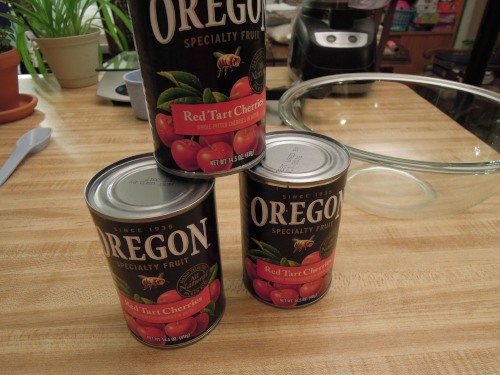
I used only 2 cans. 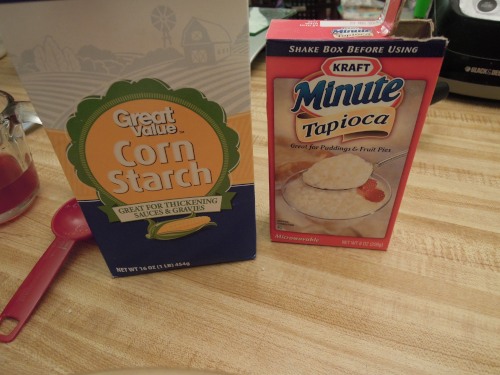
I use two different thickeneners. 
- To help prevent a soggy crust, some people recommend brushing the bottom of the crust with beaten egg white before filling. (I did not do this today, but next time I plan to try it.) Pour filling into the crust and top with dots of butter or margarine. (I usually accidentally forget the butter and the pie is still good. It adds a little more flavor and richness to the filling, but it is not the end of the world if you forget it.)
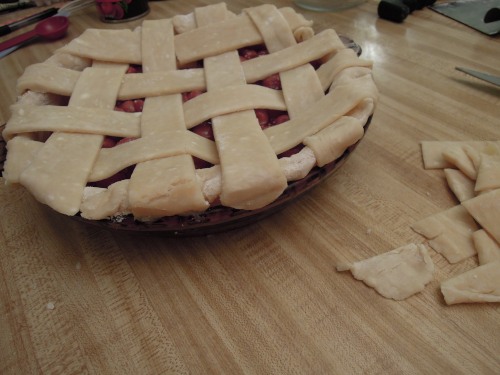
- Remove the strips of dough from the freezer and carefully transfer four of them onto the top of the cherry pie, spacing evenly. Carefully slide the other strips of dough perpendicular to the existing strips in an over and under pattern to make a lattice top.

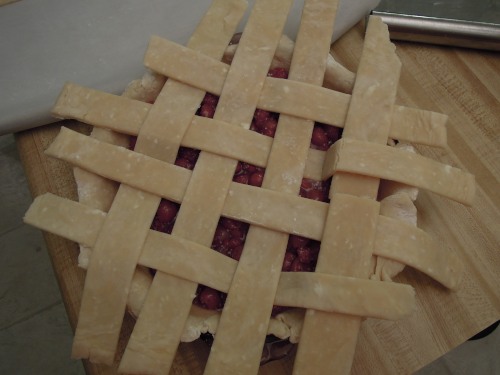
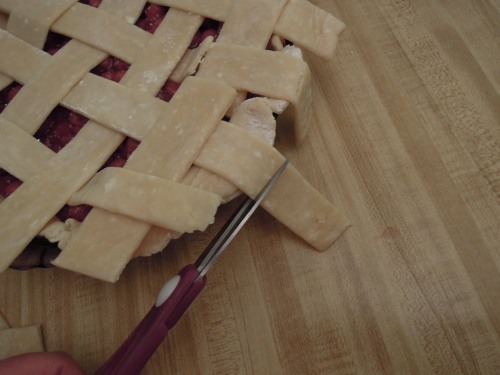
- Trim the excess edges of the strips to within 1/2 inch of the edge of the pie plate. Tuck all of the strips under the main crust and then crimp to seal the edges together. Use trimmed dough to patch any breaks or weak spots.
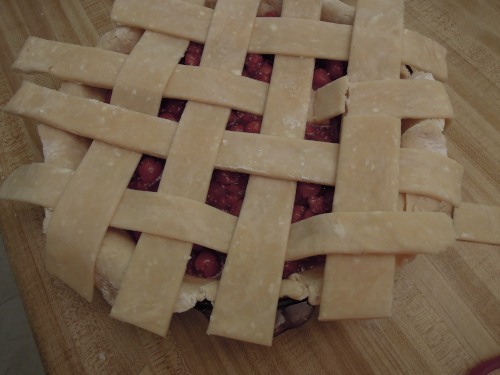
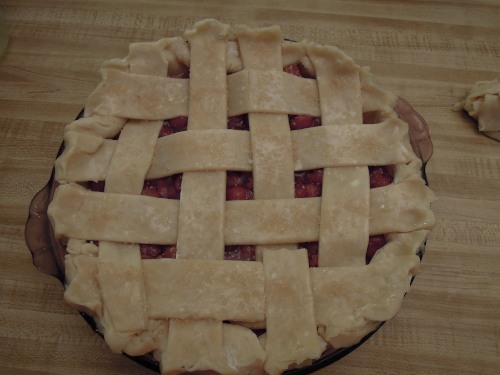
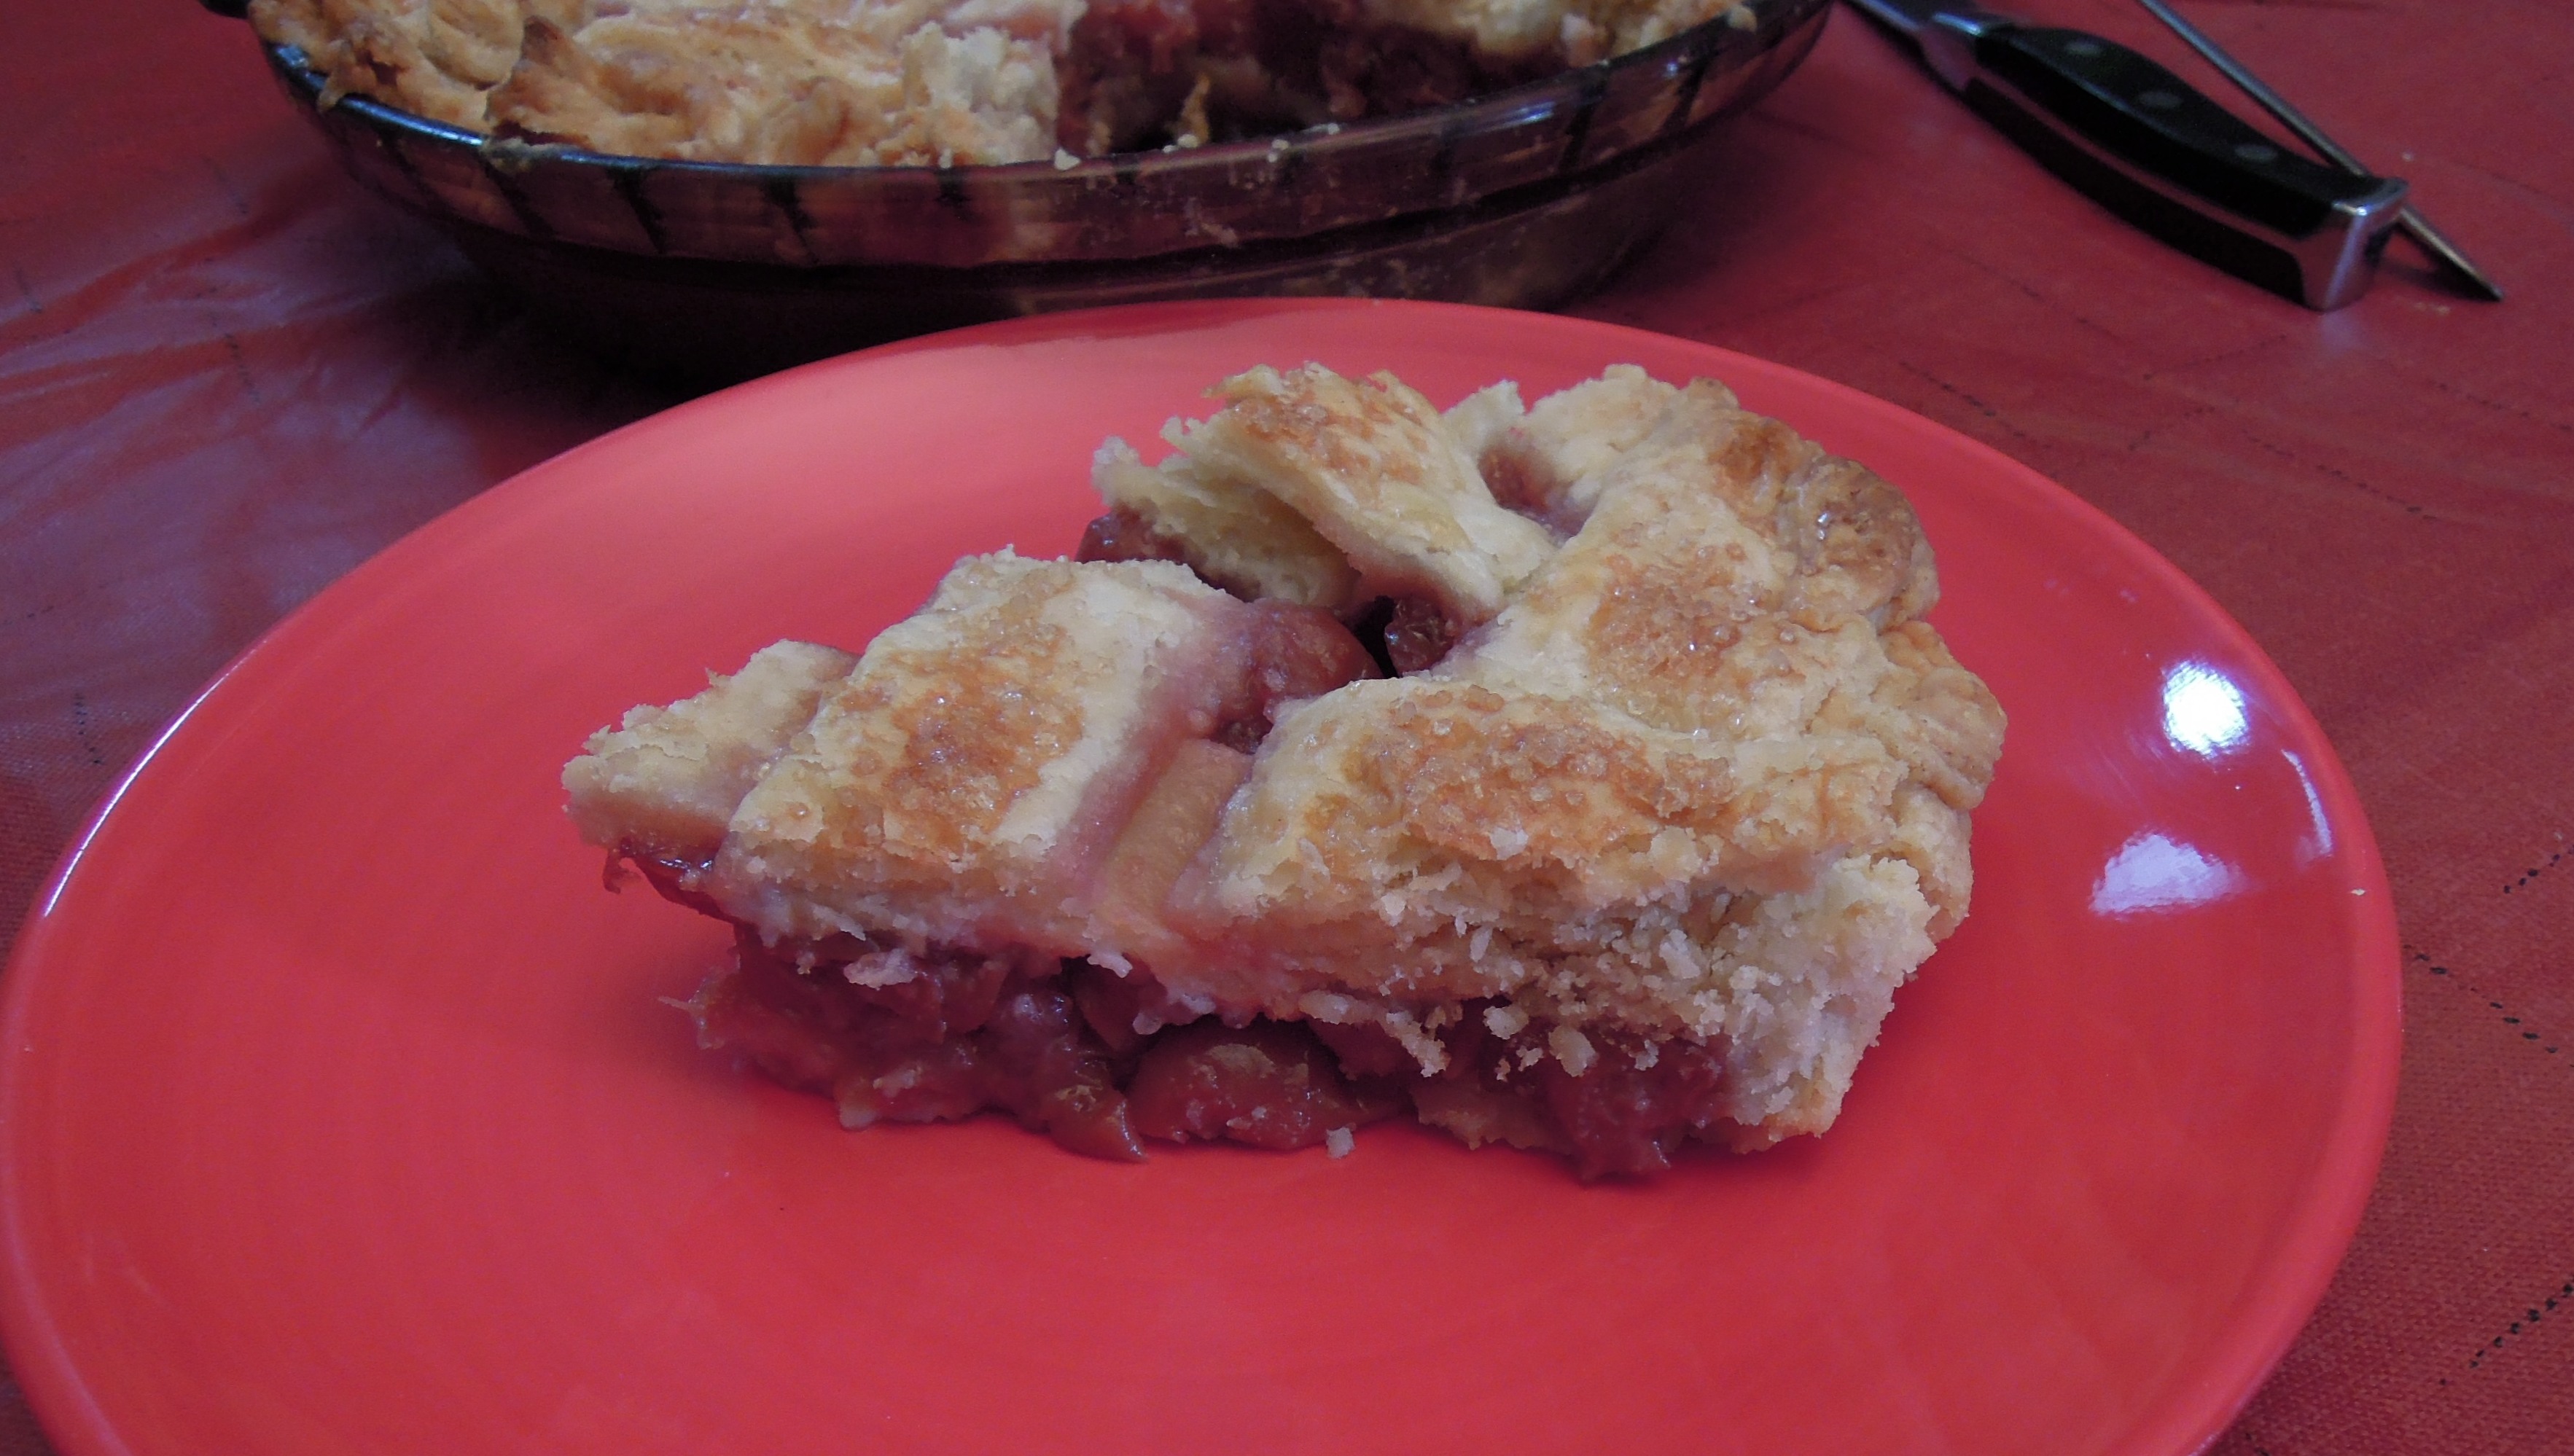
- For a beautifully browned top, brush the top of the pie with beaten egg white and sprinkle with coarse sugar.
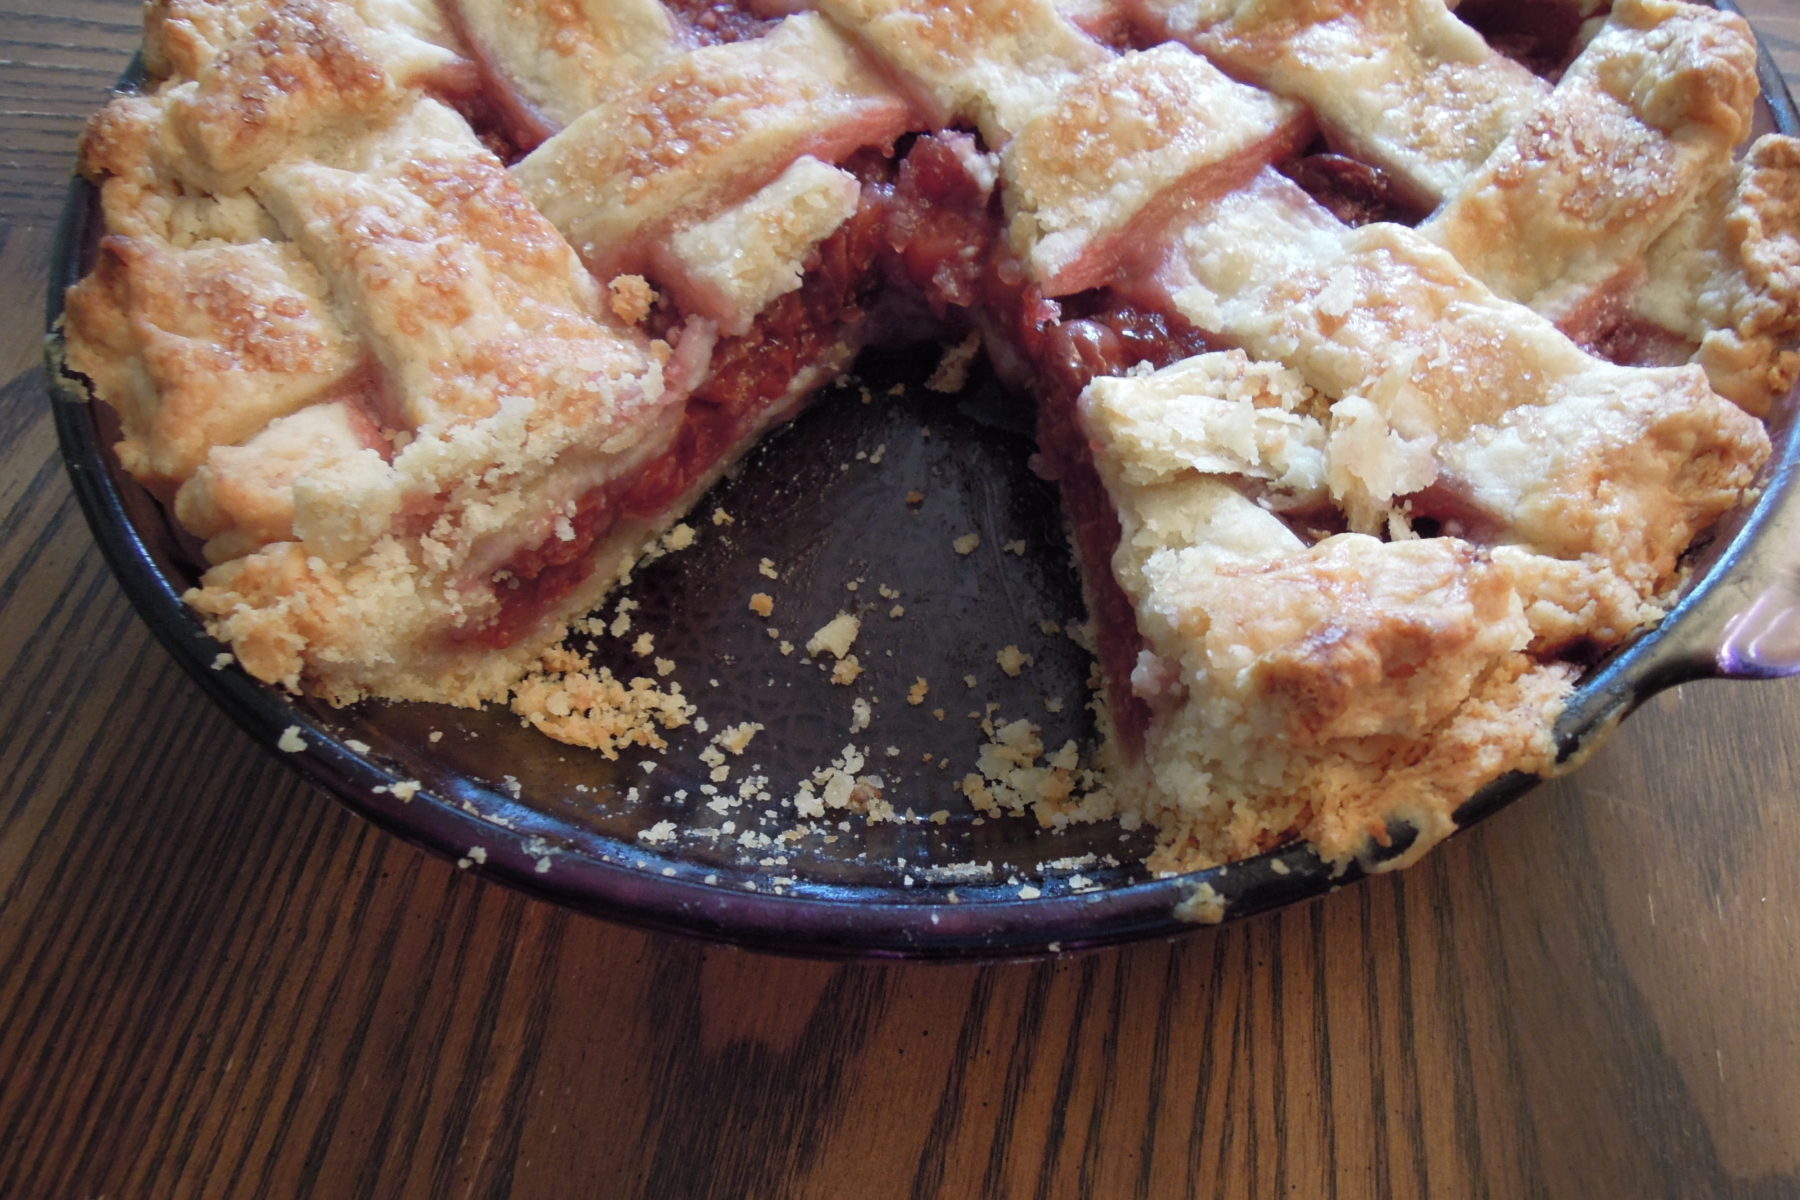
- Place the pie on the preheated pan in the oven and bake for 20 minutes. After 20 minutes, turn the oven temperature down to 375 degrees and bake for an additional 25-35 minutes, until the juices are bubbling and the crust is a deep golden brown. (Full disclosure: I underbaked my pie slightly this time and had a somewhat soggy bottom crust. Don’t be fooled by a brown top crust; the bottom may still need more time. Of course you don’t want to burn your pie, but err towards browner rather than lighter for the top. I baked mine for 30 minutes and should have gone the full 35.)
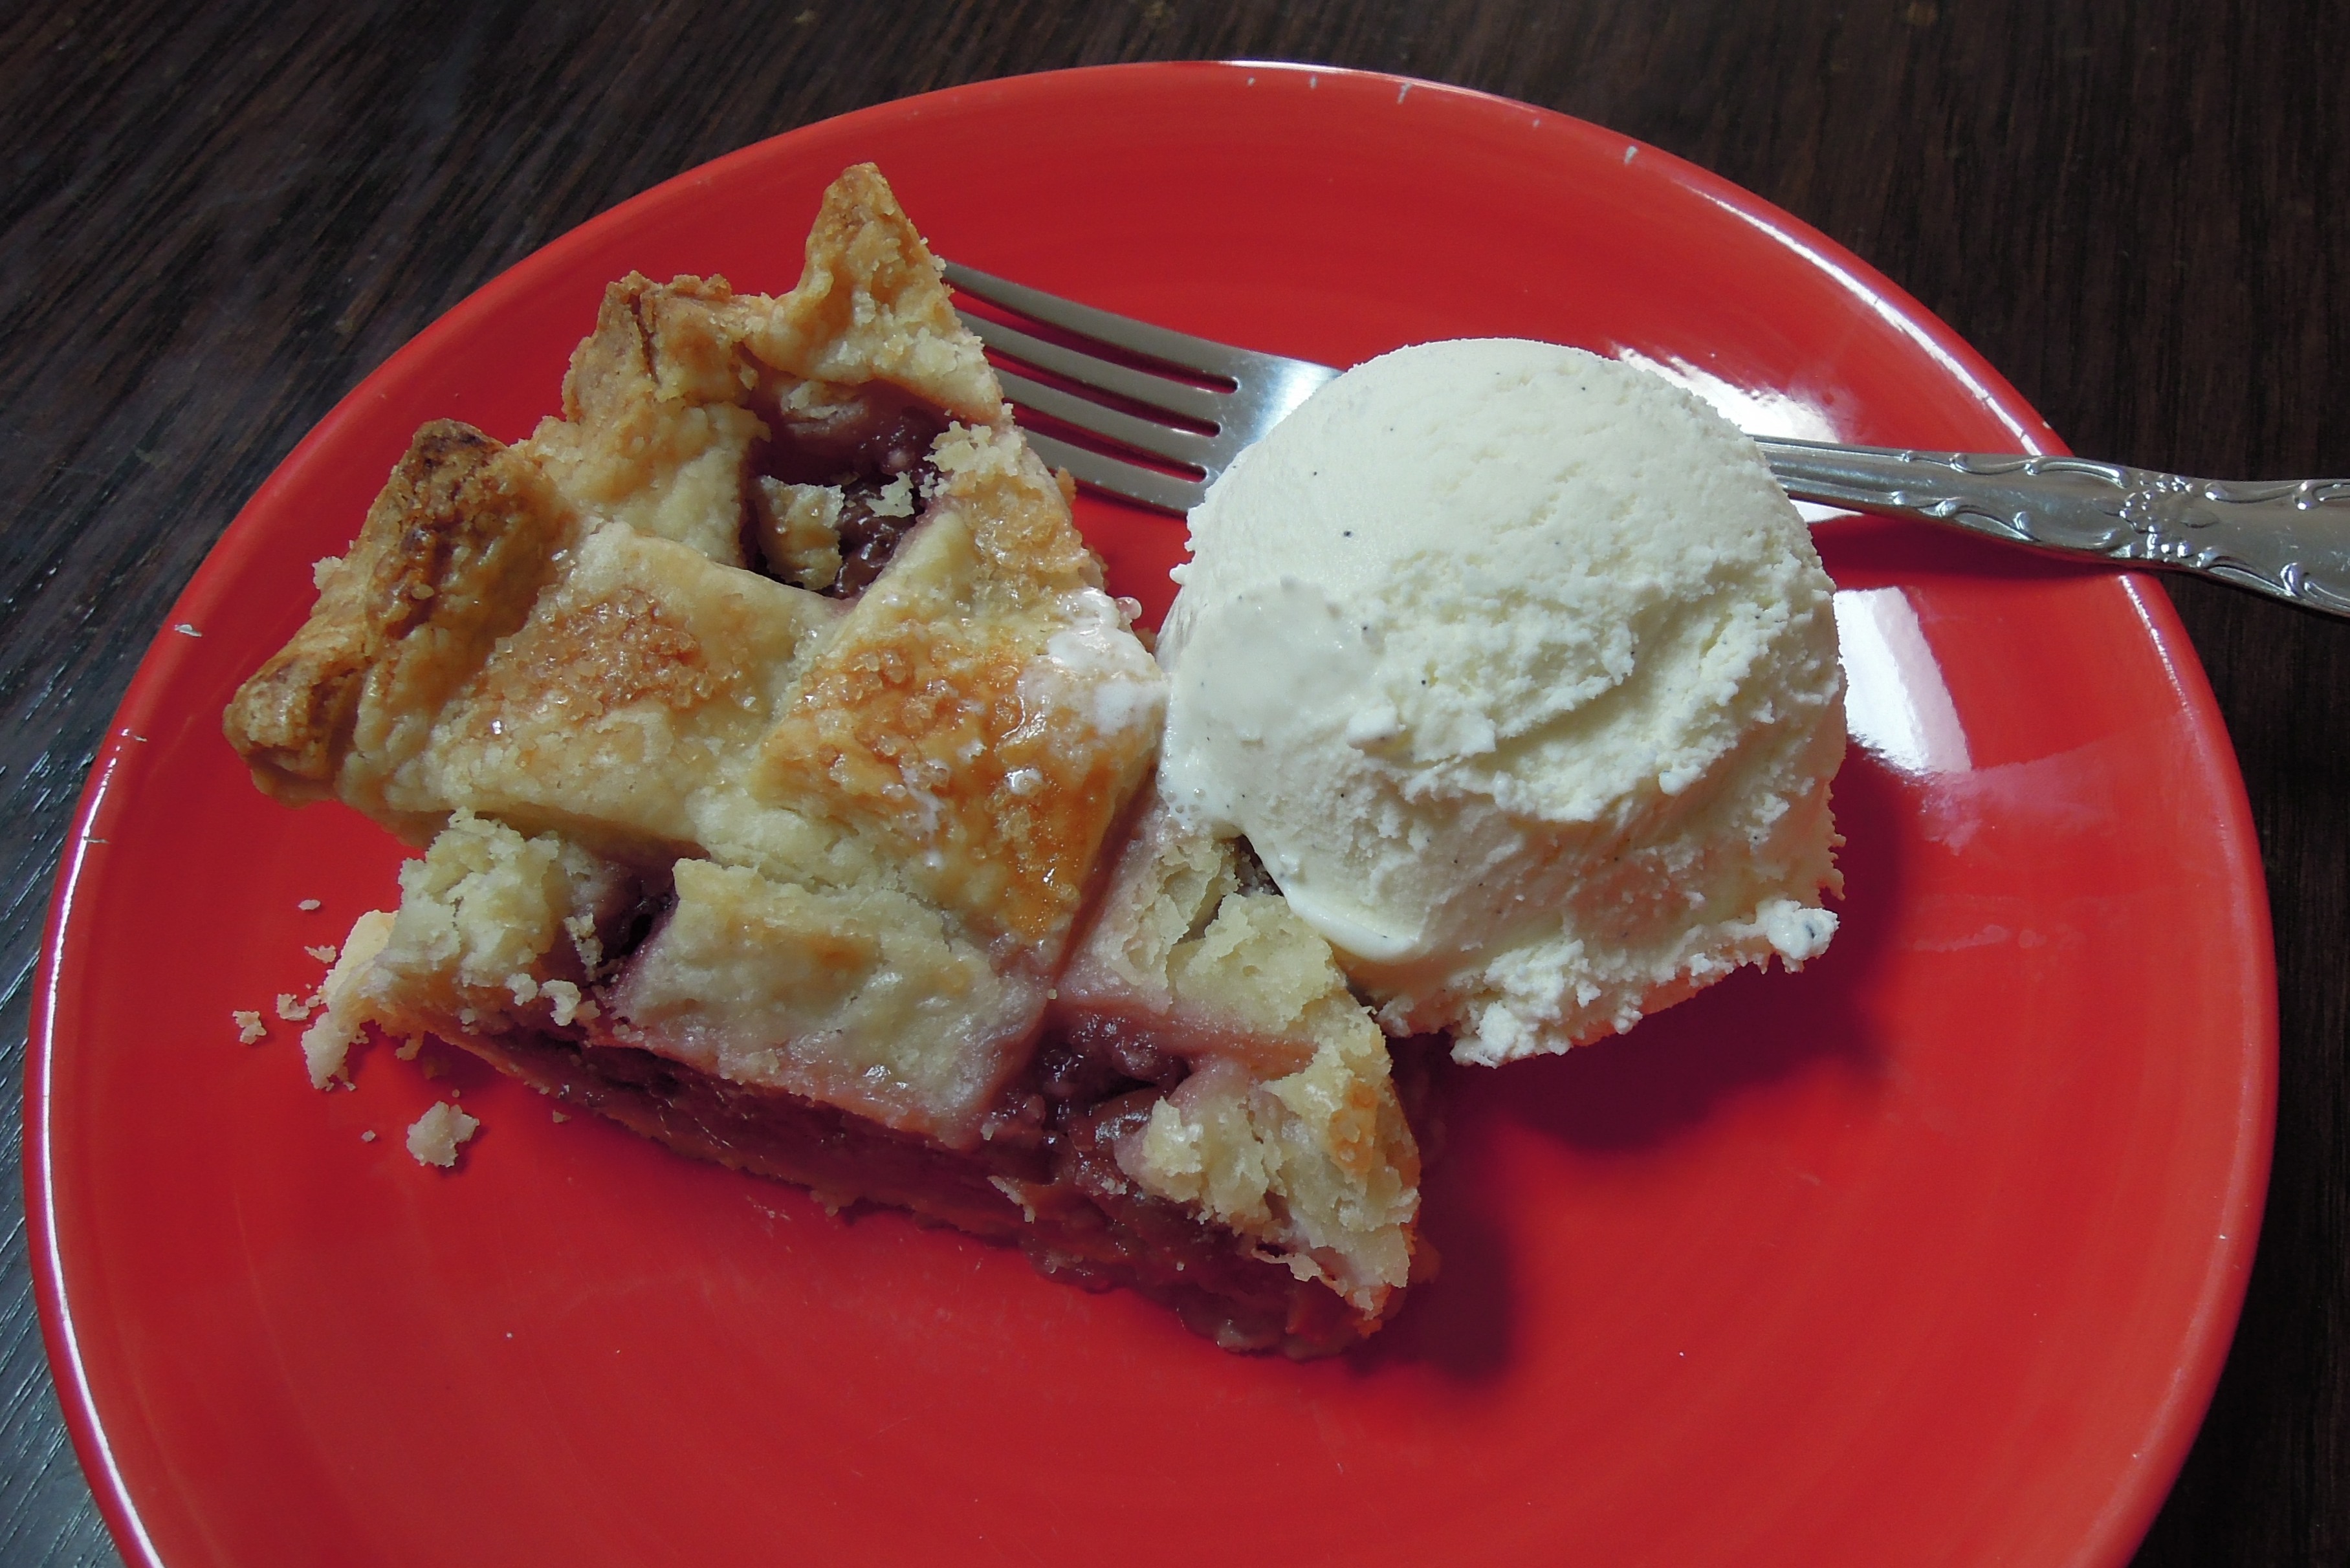
- When the pie is baked, let it cool on a wire rack until the filling has set, about 2 hours. Serve slightly warm or at room temperature. A scoop of vanilla ice cream on top would be divine.

Source: Crust from The America’s Test Kitchen Family Baking Book. Filling from Allrecipes.com. (I cannot locate the cherry pie recipe from which I adapted this.)