 Oh my goodness! I came across this idea several years ago, and they have been the hit of fall and Halloween every year since.
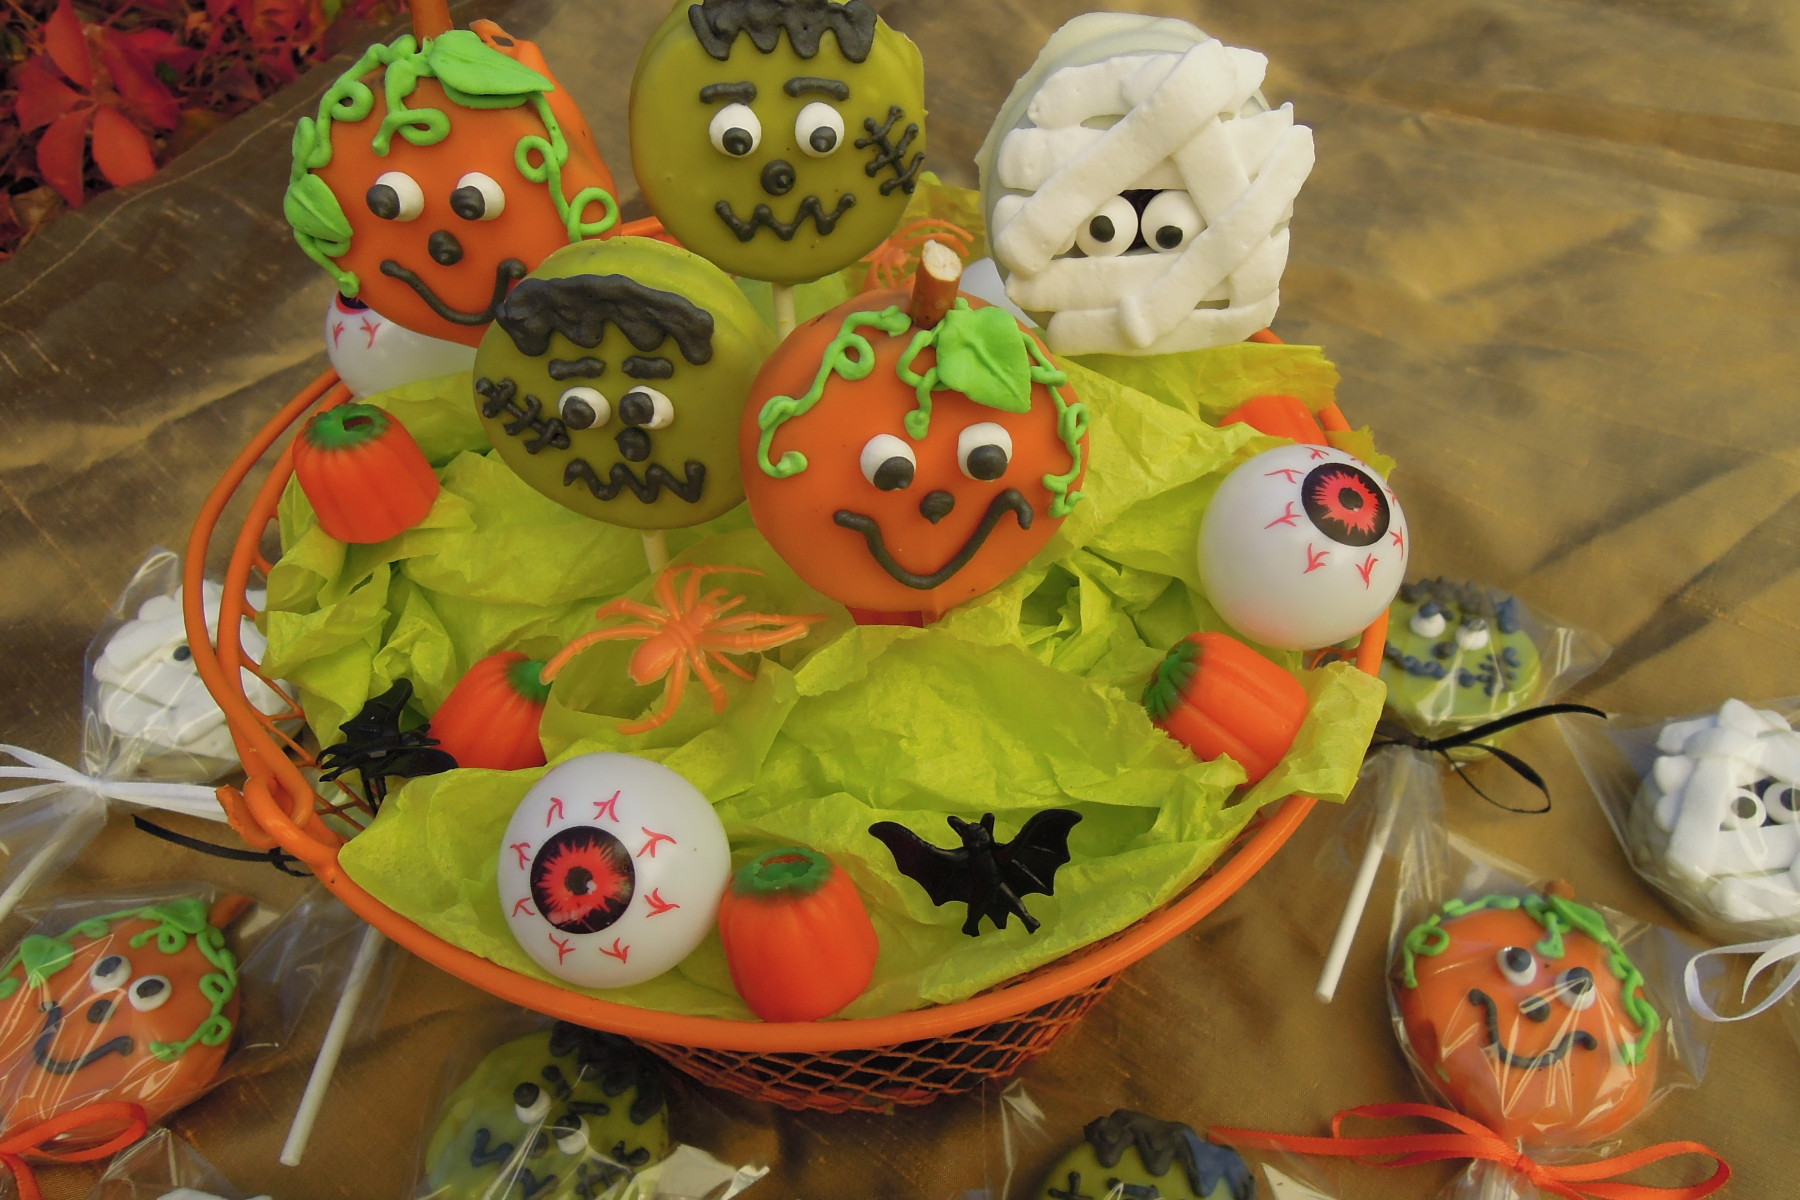
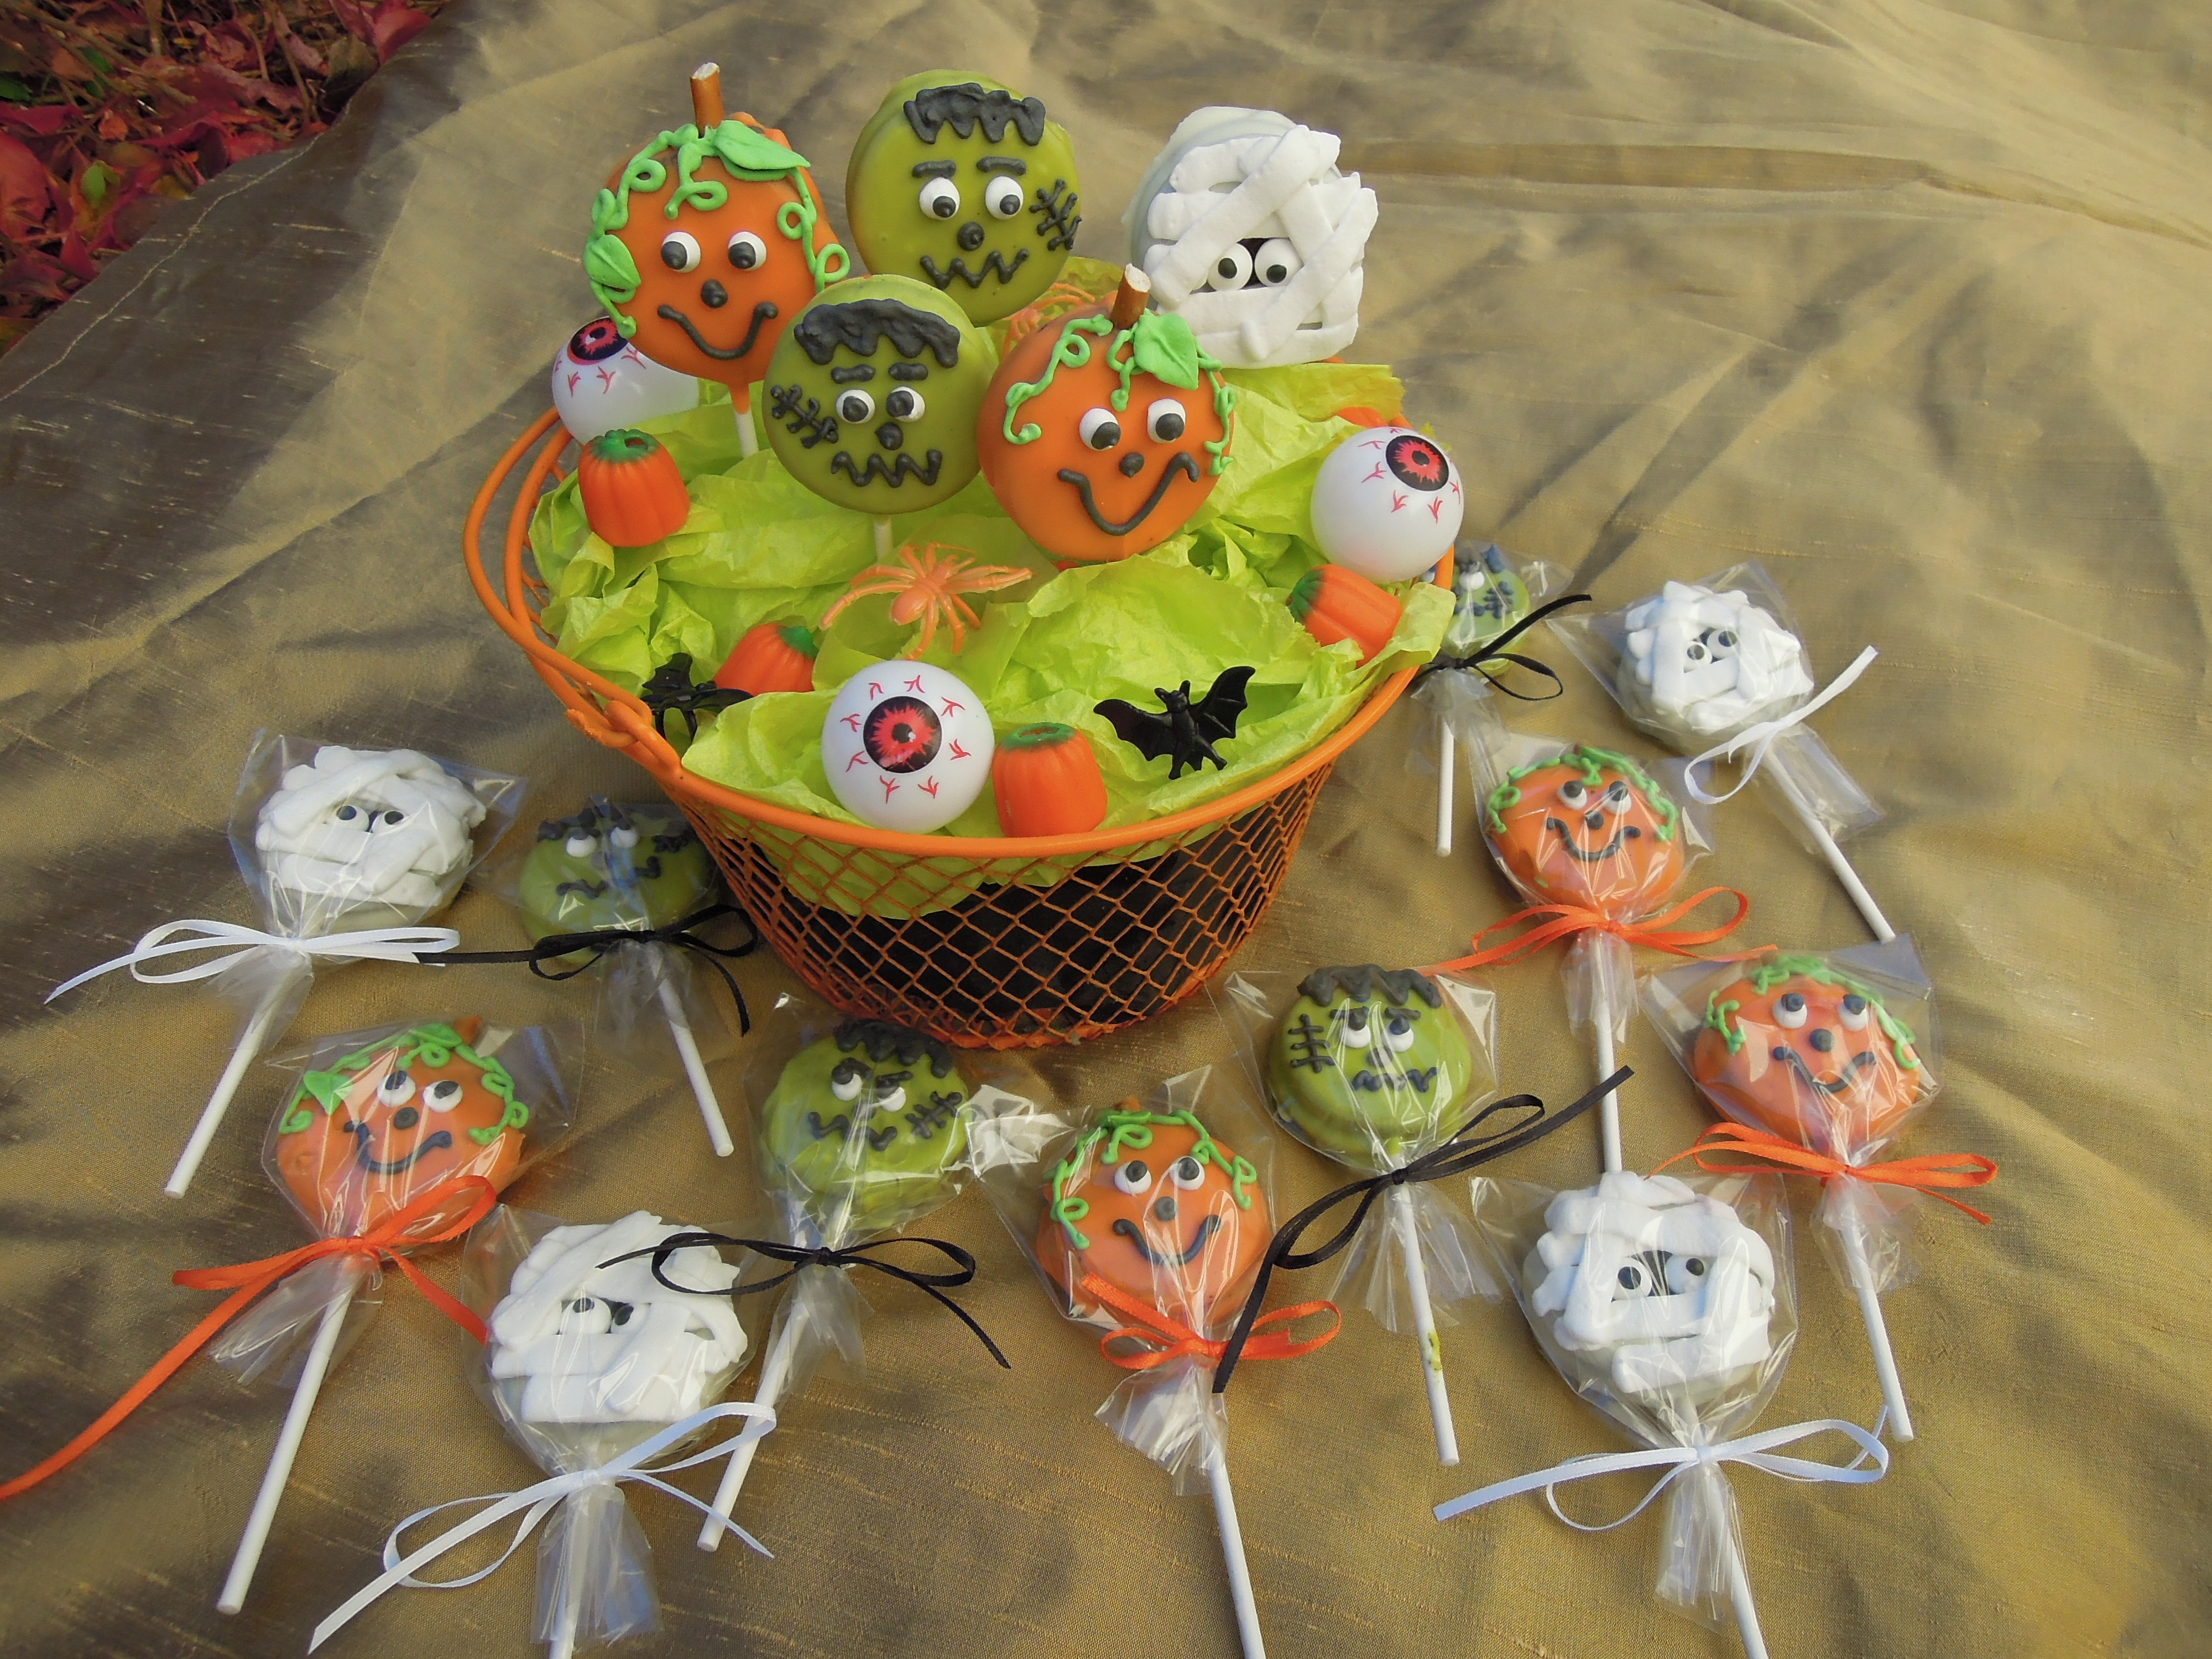
These are not hard to make, but they do take some time and patience. You are basically securing an Oreo onto a stick, coating it in chocolate, and then decorating it in fun Halloween designs. I make mummies, pumpkins, and Frankensteins. The pumpkins are usually the most popular; I suppose because they are the most familiar and friendly for little ones. 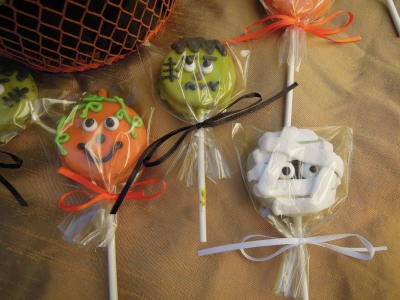
If you decide to make these in a large quantity, be sure to give yourself two days to work on them. You need to have drying and setting time between steps.

Halloween Oreo Pops
Ingredients:
For the Oreo pops:
- regular-size Oreos in your choice of flavor
- lollipop sticks
- chocolate melts or almond bark (For the mummies, pumpkins, and Frankensteins, you will need white, orange, and bright green.)
- parchment paper
- pretzel sticks (for the pumpkin stems if you are doing this design)
- candy eyeballs (I use these for the mummies, if you are making this design)
- royal icing (see the recipe below) and gel colors (I used black and green)
- optional: plastic treat bags and colored ribbon for packaging
Directions:
For the Oreo pops:
- Melt a small amount of chocolate or almond bark in a small bowl or cup.
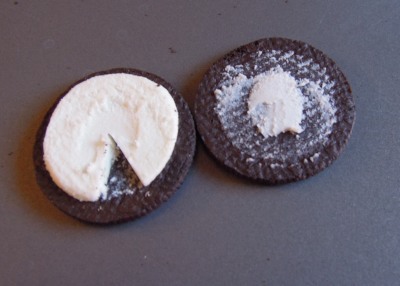
- Open one Oreo at a time by gently twisting and pulling at the same time. Use a paring knife to cut a notch out of the cream filling for the lollipop stick to fit into.
- Dip the end of one lollipop stick into the small bowl of melted chocolate. Use the stick to spread a small amount of chocolate over the cream filling of the open cookie and then place the stick at least half-way up the cookie into the notch you cut. Spreading the melted chocolate will help “glue” the Oreo back together and keep the stick in place.
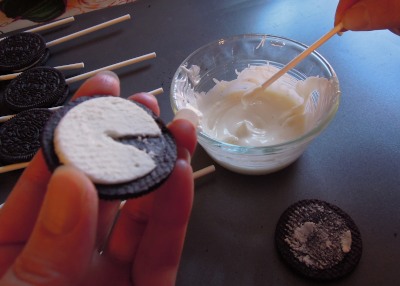
Dip stick in melted chocolate. 
Spread chocolate on cookie. 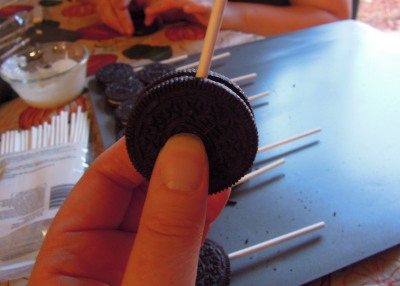
Press together and hold. - Continue opening Oreos and placing lollipop sticks for however many you are doing, melting more chocolate as needed. Let the Oreo pops sit for at least 30 minutes to dry and set. (Sometimes I do this step one day and come back for the next step the next day.)
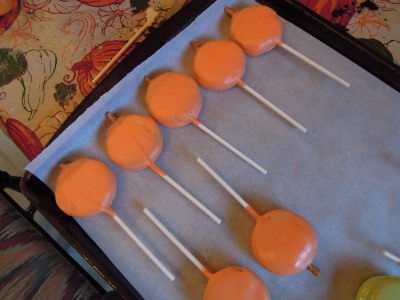
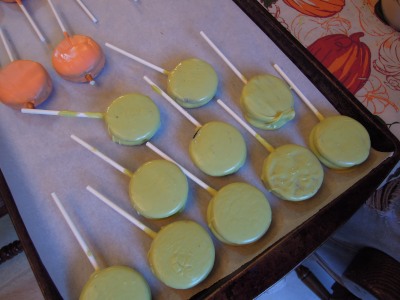
- Melt chocolate in the color of your choice in a tall coffee cup, measuring cup, or a deep narrow bowl. Using something deep and fairly narrow will make it easier to dip the pops without wasting a lot of chocolate. Line a baking sheet with parchment paper.
- Take one Oreo pop at a time and gently plunge it into the cup of melted colored chocolate. I always try to make sure I get the chocolate all the way up and around where the stick comes out of the Oreo pop. This will also help keep the stick stable on the pop. Twist and turn the Oreo pop to make sure it is fully coated. Quickly pull out the Oreo and flip it right side up. Tap the stick gently on the side of the cup to remove excess chocolate. Place the wet pop on a parchment-lined baking sheet or stick the pop into a piece of floral foam to dry. Continue for the remainder of Oreo pops, melting more chocolate or reheating chocolate as needed.

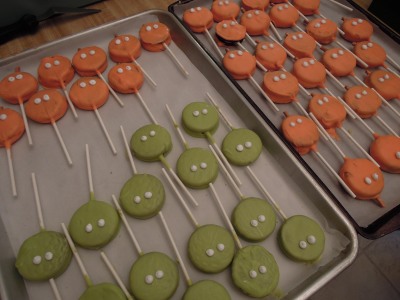
- If you are making pumpkin Oreo pops, cut small segments of pretzel sticks to use as stems for the pumpkins. It is most effective to add these to the wet pops right away as you are doing them. The wet chocolate will secure the stem without needing to attach it separately later. This is also true for candy eyeballs. If you are using candy eyeballs for any of your pops, it is easiest to stick them in place right away while the chocolate is still wet.
- Let Oreo pops dry completely before finishing the decorating.
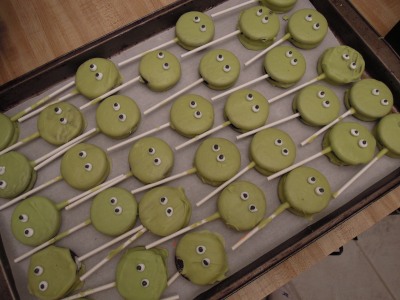
- Decorate as desired. I use an “assembly line” system for decorating. I make royal icing and put an appropriate amount of white in a piping bag with a size 2 tip and then add all the white features to all of my pops. For the mummies, I used the smooth side of a 47 basket weave tip to make the wrappings. Next, I color an appropriate amount of icing black and add all of the black features to the pops. I used a size 2 tip for everything except Frankenstein’s stitches; those are a size 1 tip. Finally, I color an appropriate amount of icing green and add the vines and leaves to the pumpkins, using a size 2 tip and a size 67 leaf tip.
First do all the white parts. 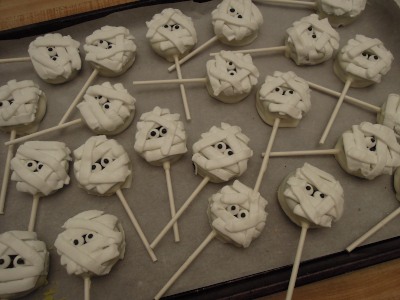
Use tip 67 for wrapping mummies. 
Add all the black features next. 
Add black features. 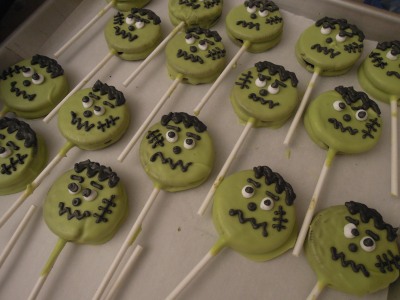
Finish with stitches with tip 1. 
Add pupils, nose, and mouth. 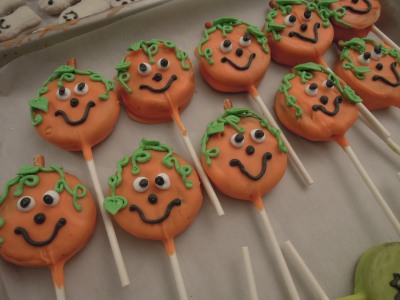
Finish with the green leaves and vines. - After decorating, let Oreo pops dry and set completely before packaging in treat bags or stacking in an airtight container.
Royal Icing:
(I use royal icing to decorate the Oreo pops because it dries hard and allows me to stack and package the pops without smearing the design. I have never tried using packaged decorator icing, but you may be able to use that if you are not planning to stack or package your pops.)
Ingredients:
*I decorated 106 Oreo pops with this recipe and still had some leftovers. Scale this down for a smaller batch.
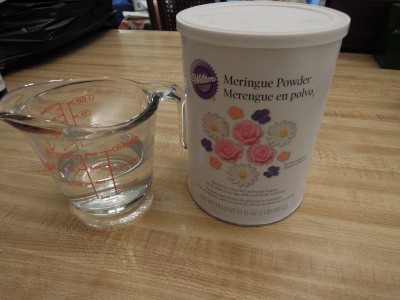
- 4 tablespoons meringue powder
- scant 1/2 cup water
- 1 pound of powdered sugar, sifted
- 1 teaspoon light corn syrup
- few drops of clear extract (I used almond)
Directions:
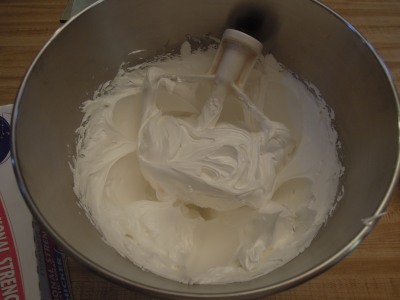
- Combine meringue powder and water in the large bowl of a stand mixer. Beat with paddle attachment until foamy. (Meringue powder can be found in the cake decorating and crafts area of Wal-mart or at craft stores such as Hobby Lobby.)

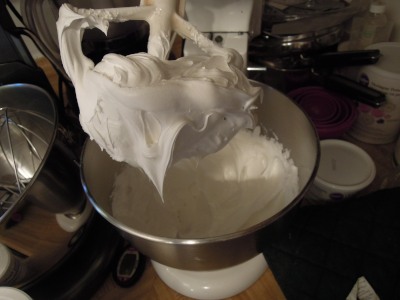
- Sift in powdered sugar. Beat on low just to combine. Add in corn syrup and extract.

I use a wire mesh strainer to sift sugar. 
Icing will be shiny and runny at this point. - Increase speed to medium high/high and beat for about 5 minutes, just until icing is glossy and stiff peaks form. Do not overbeat.
- *This recipe and instructions make stiff icing for outlining and decorating. If you want to use this to flood a cookie, add water 1 teaspoon at a time, stirring with a rubber spatula (do not beat) until the consistency of syrup.
- Store in a container with plastic wrap pressed onto the frosting and then covered.
Source: I have seen many different designs for Oreo pops all over the internet. The royal icing recipe is from Bake at 350.
Which one is your favorite?

Pingback: Easy Cookie Truffles {3 ingredients, no bake} | Christine's Taste of Heaven