
 Recently, the director of my church’s preschool program approached me about making a cake for the school’s Happy Birthday, Jesus party. The problem is that some of the kids in the school have severe allergies–gluten, eggs, dye, etc. She really wanted a treat for the children but was limited in her choices. She did not want to single anyone out by having separate treats for those with allergies but wanted something everyone could enjoy.
Rice Krispie treats seem to be the best choice for most allergies. I am sure some people still have allergies to some of the ingredients, but it fit the gluten-free, egg-free, dye-free requirements for this particular group.
Even though we were limited by allergies, I still wanted to make the treats as festive and fun as possible. A plain old square krispie treat didn’t seem very festive.
I started with a double batch of the Perfect Rice Krispie recipe from Cookies and Cups which I have made many times now and have grown to love. They are so soft and chewy and the touch of salt is the perfect addition. Using a non-stick pan for krispie making has also changed my world. Until trying this recipe and using a non-stick pan earlier this year, I hated making rice krispie treats and had only done it a few times. They were just so sticky! Not anymore. If you are not using non-stick for your krispie treats, I highly suggest you try it. I don’t have a non-stick pot, but my over-sized non-stick skillet works just great.

Perfect Rice Krispies
Ingredients:
- 5 tablespoons butter (2.5 ounces)
- 8 cups plus 2 cups mini marshmallows (12.8 ounces plus 3.2 ounces)
- 6 cups krispie cereal (6 ounces)
- 1/2 teaspoon salt
Instructions:
- Line a 9 x 9 pan with foil or parchment and spray lightly with cooking spray. Set aside. (I made a double batch for this project and used a half-sheet baking pan.)
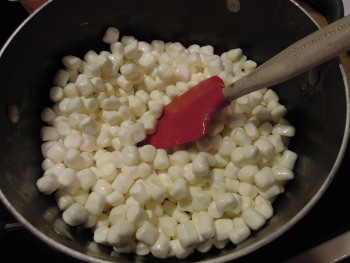
- Melt butter on low in a large non-stick pot or frying pan.
- Once butter is melted, add the 8 cups (12.8 ounces) of marshmallows and stir frequently to cover with butter and melt.
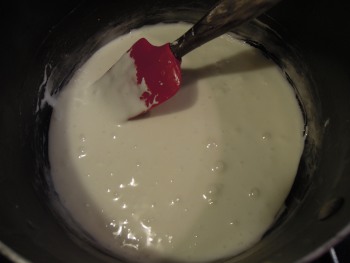
- Once the marshmallows are just melted, remove from heat and stir in the cereal and salt until coated. Add in the extra two cups of marshmallows and stir to combine.
- Press mixture gently into prepared pan and allow to cool before cutting to desired size and shape.
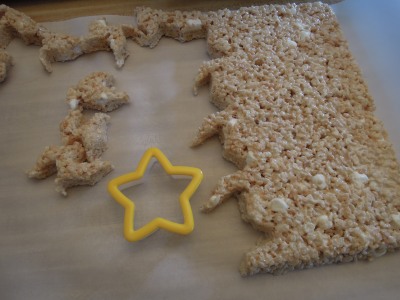
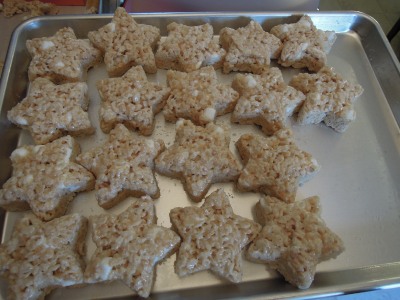
I pressed my krispie treats into a half-sheet baking pan and let them cool for a while. I removed the whole batch from the pan and onto a counter top. I used a plastic star cookie cutter to cut the treats into pieces. Amazingly, I was able to gather the scraps of krispie treats left over from cutting and press them into the cookie cutter to get additional stars. (Try not to pack them too hard into the cutter or they will get too hard for eating.) I had no wasted krispie treats!
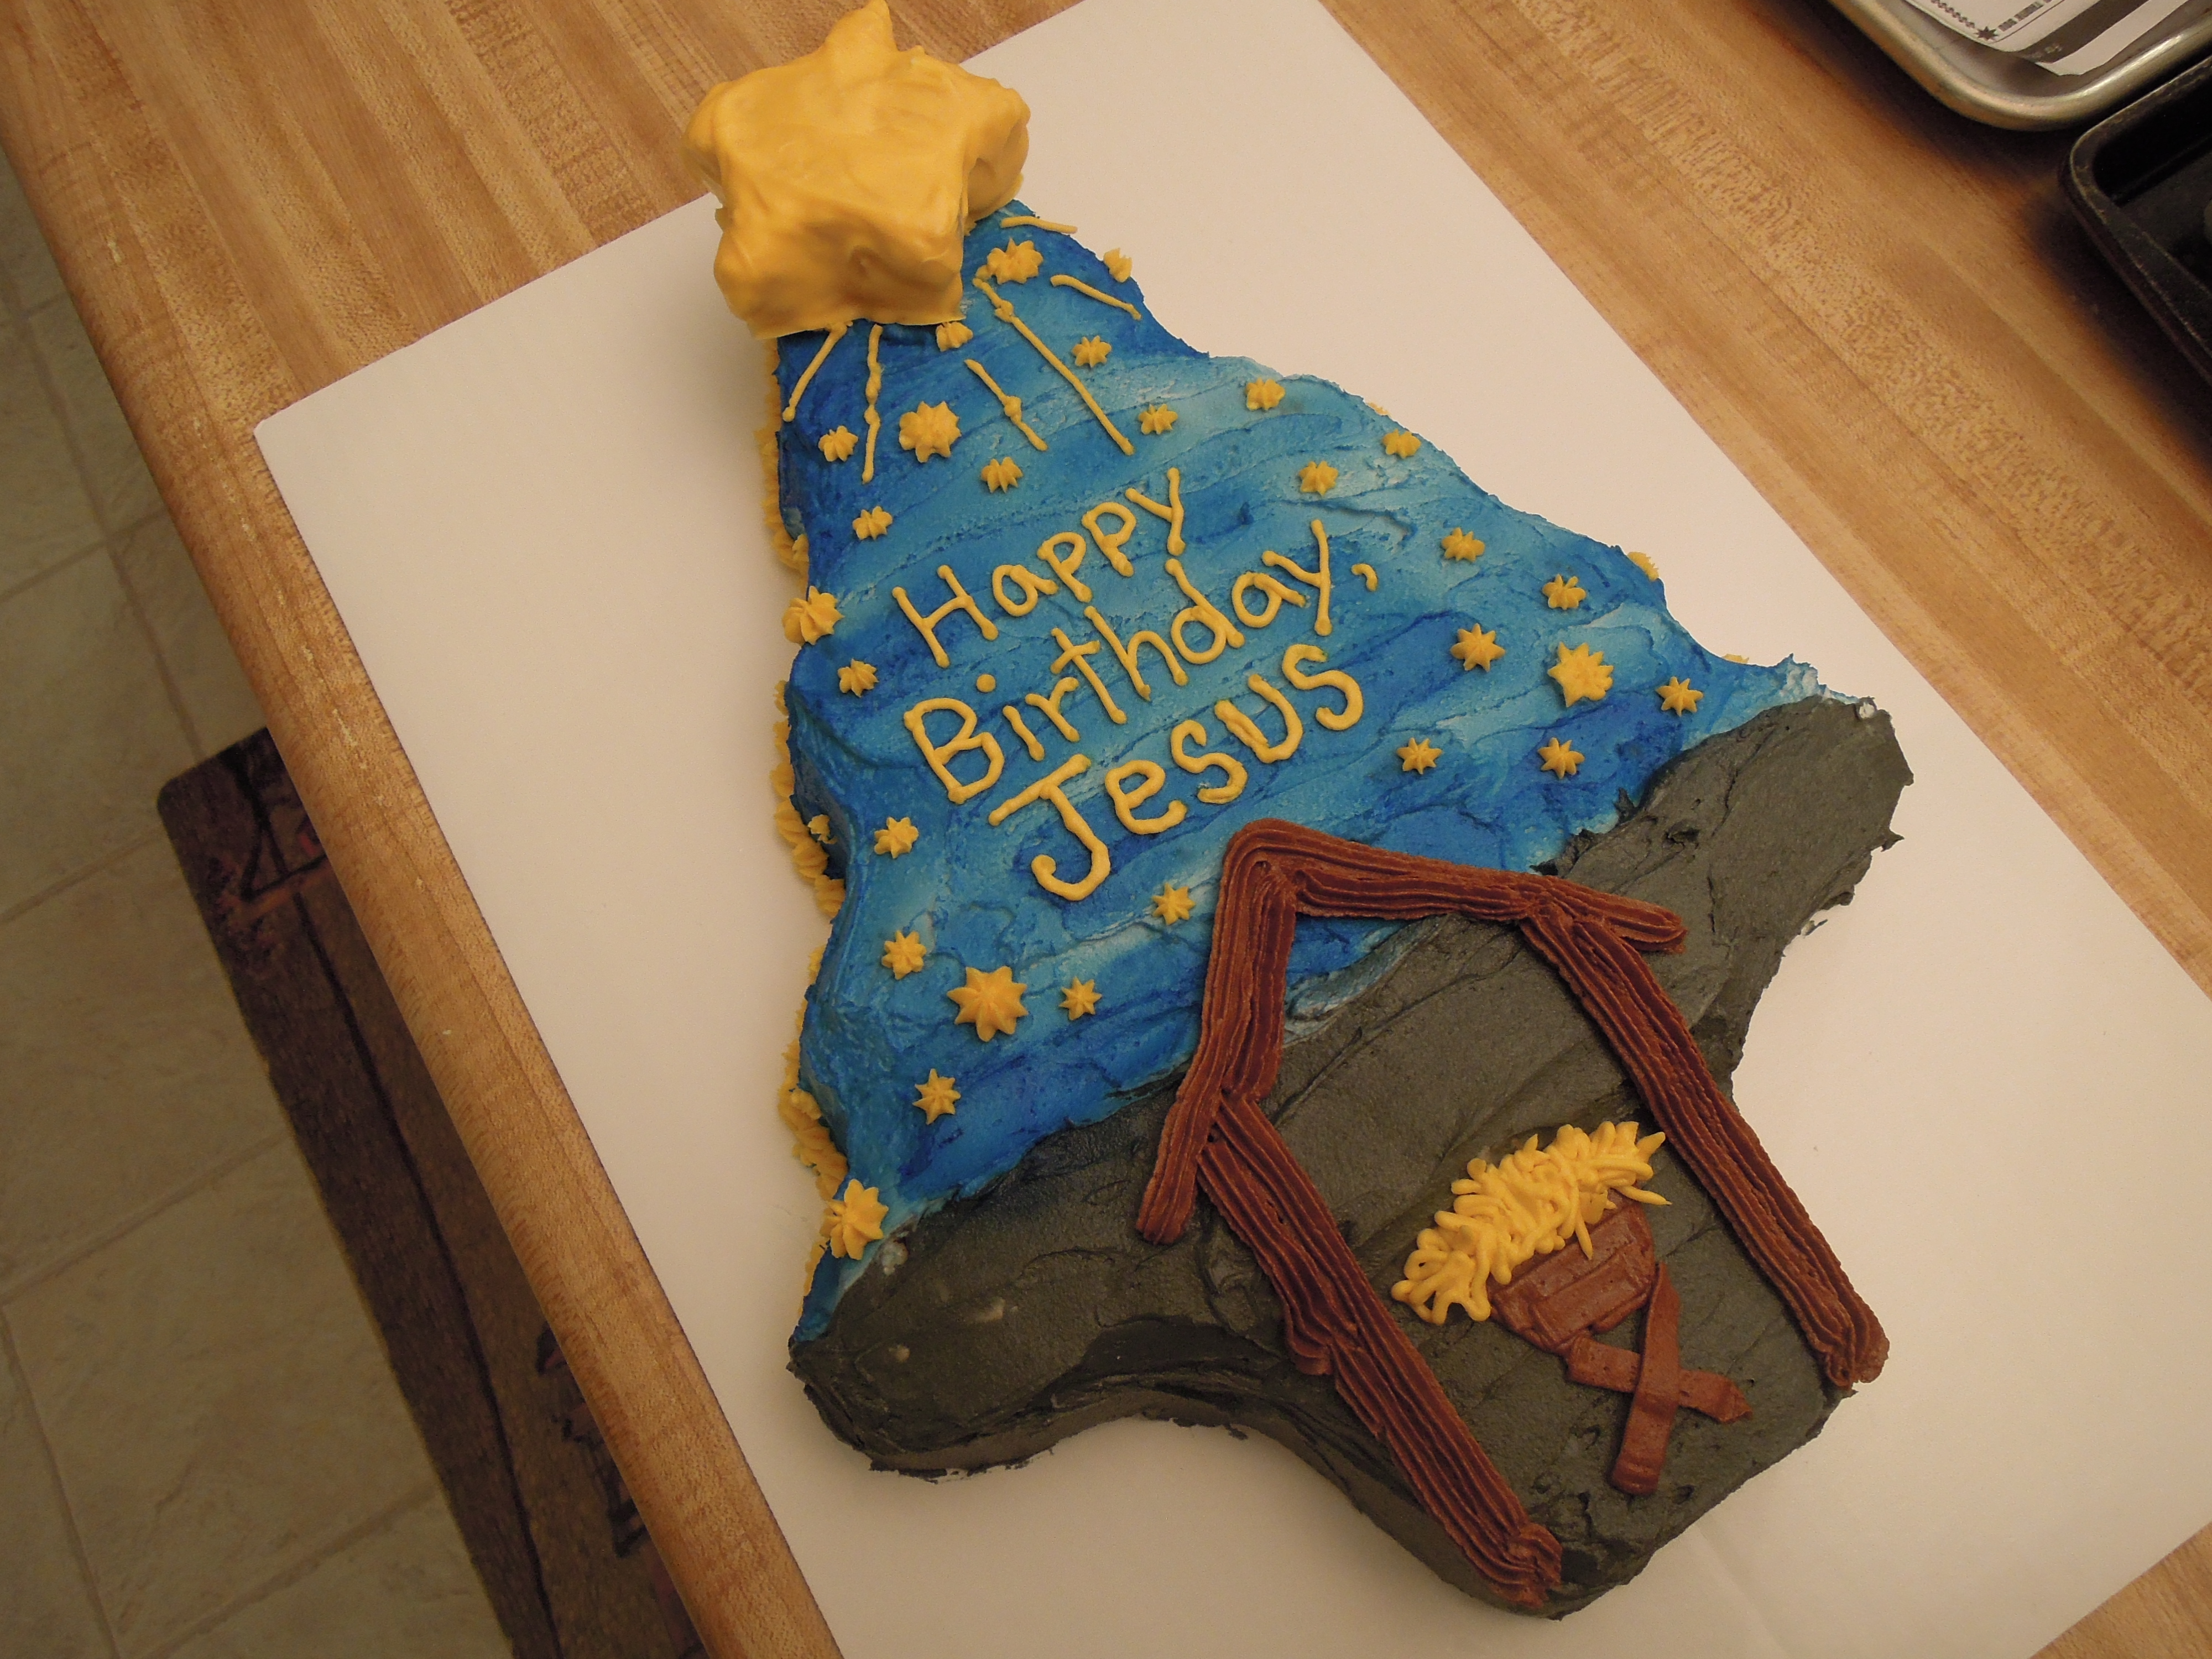
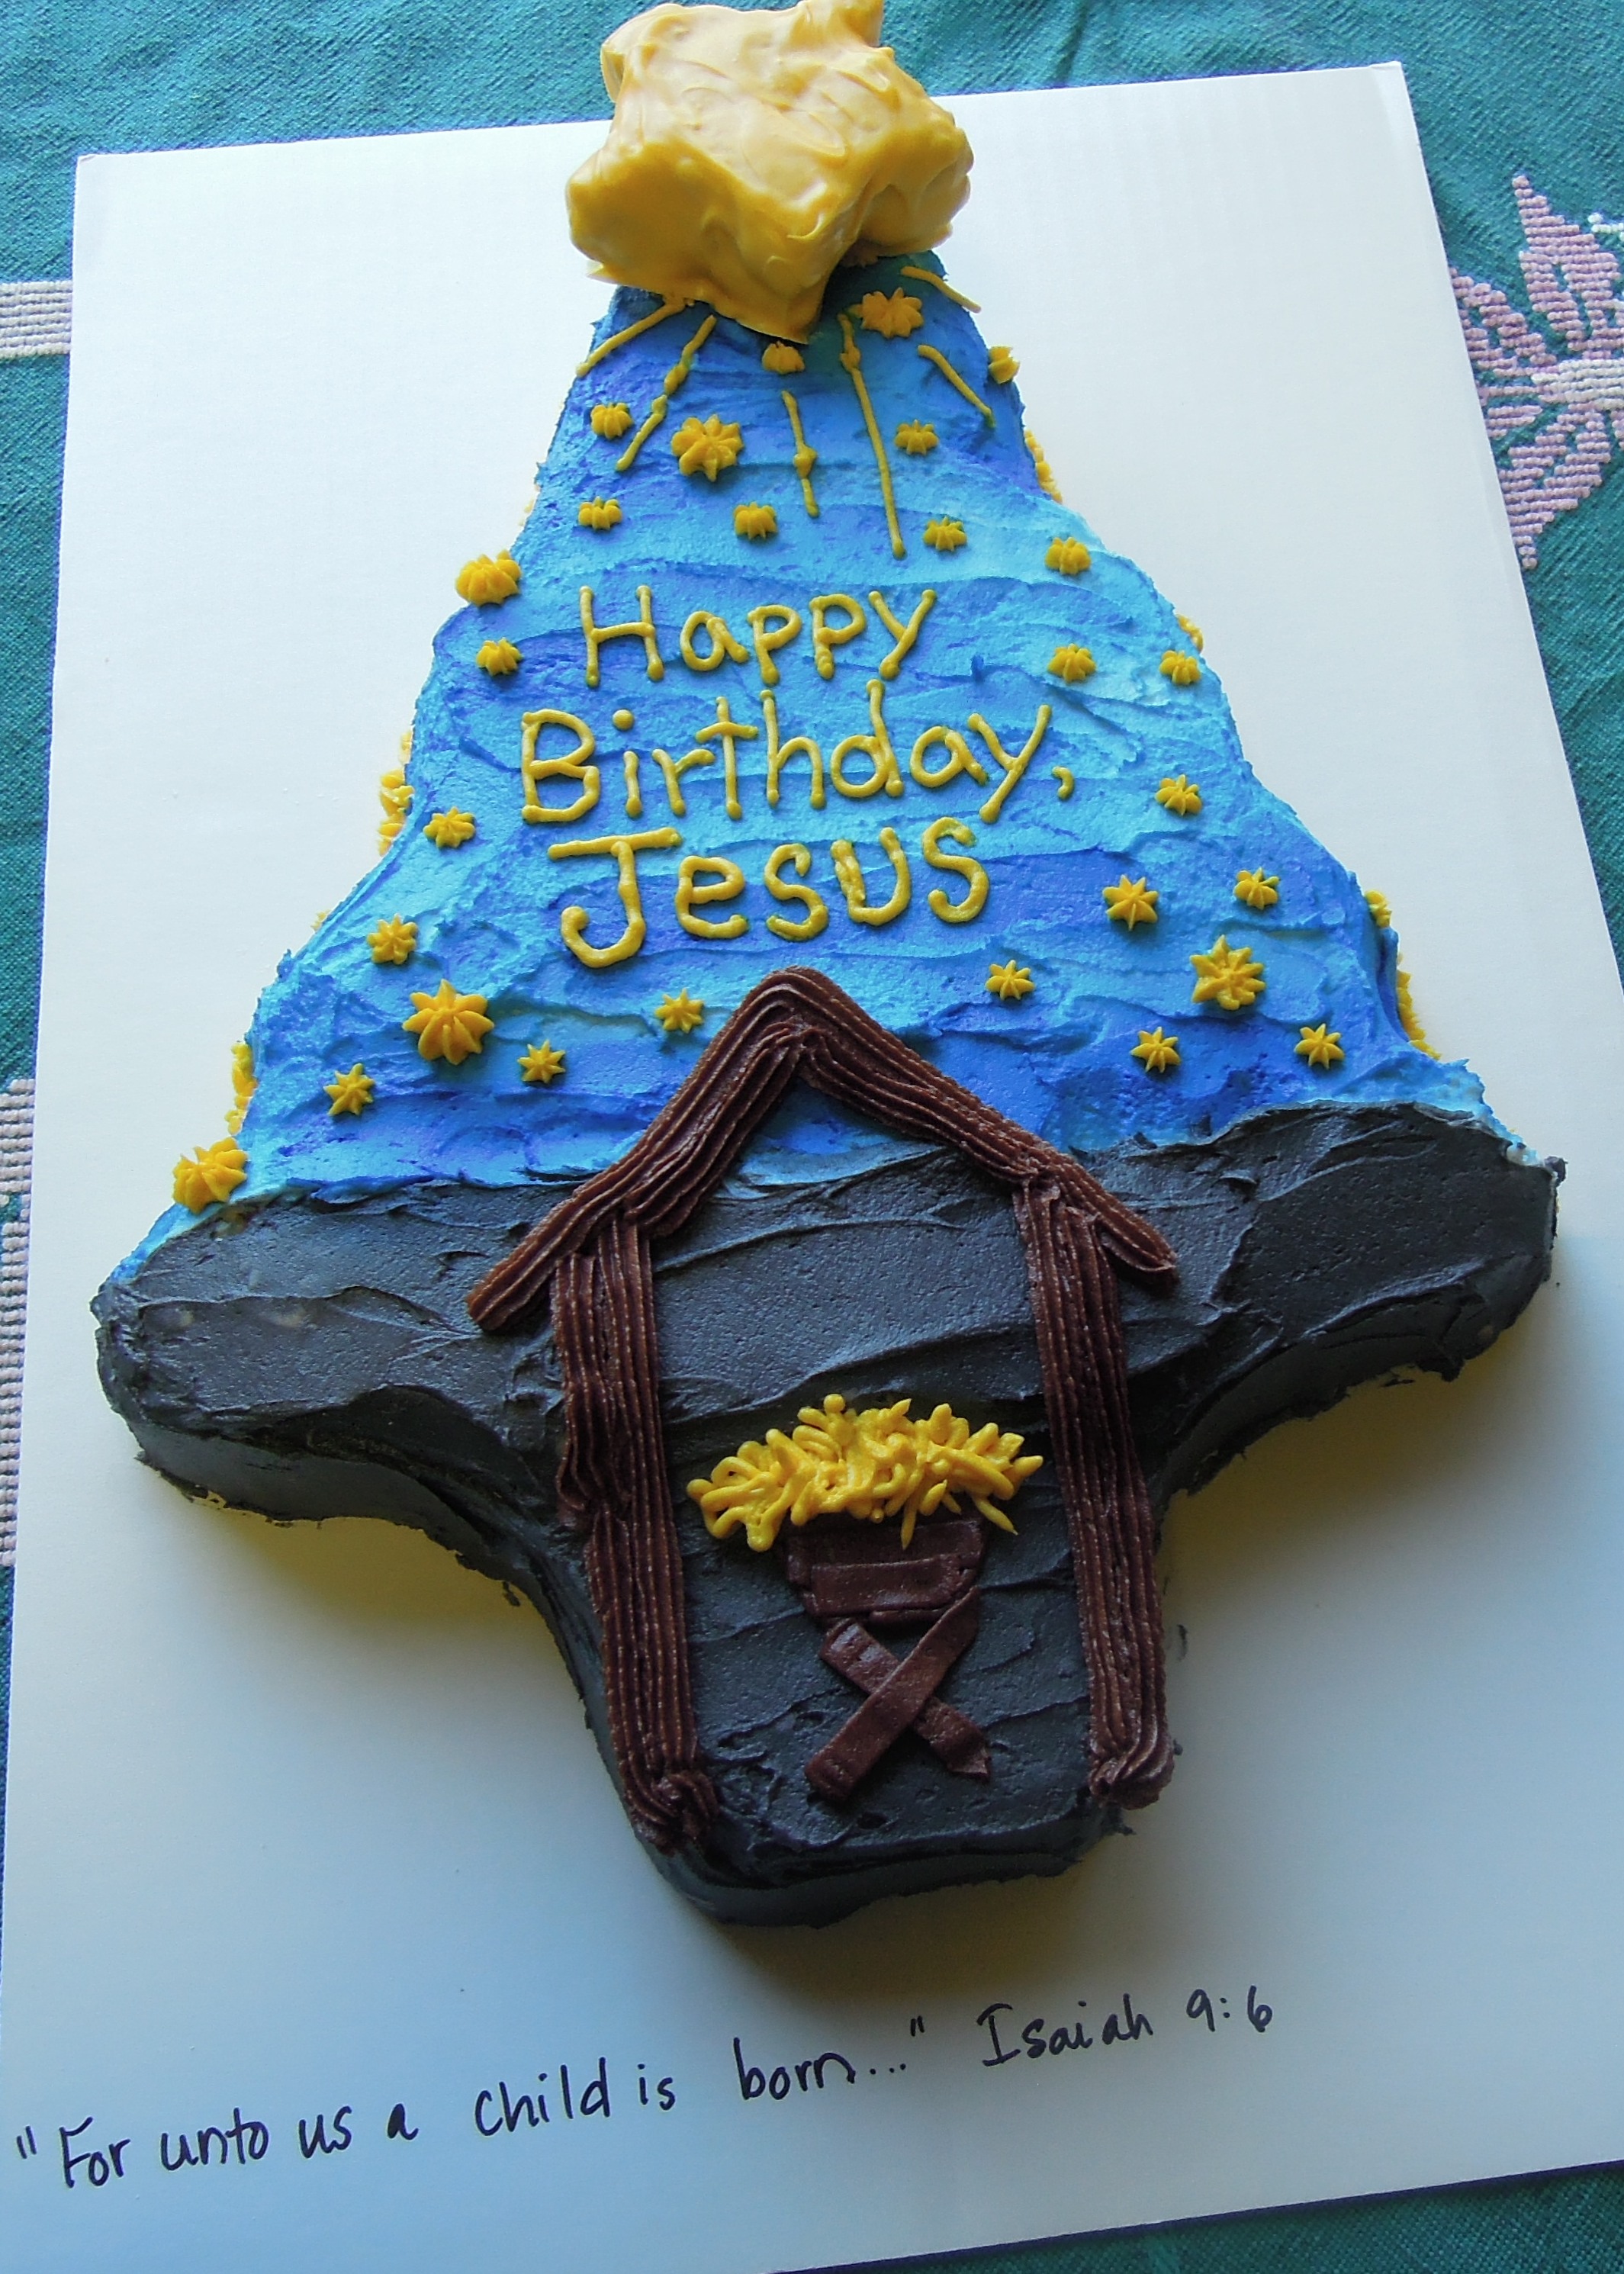
Next, I made another double batch of krispie treats and pressed them into a well-buttered cake pan shaped like a Christmas tree (a regular shaped pan works fine too). I let the tree cool and then turned it out onto a cake board.
I made this basic buttercream frosting from Wilton.
Basic Buttercream
*This makes about 2 1/4 cups icing. You may need a bigger batch, depending on the size of your cake.
Ingredients:
- 1/2 cup solid vegetable shortening such as Crisco (3.25 ounces)
- 1/2 cup butter or margarine, softened (4 ounces)
- 1 teaspoon vanilla extract (use clear if you want pure white frosting)
- 4 cups sifted powdered sugar (1 pound)
- 2 tablespoons milk or more to desired consistency
Instructions:
- In large bowl, beat shortening and butter thoroughly until combined. Beat in vanilla.
- Gradually add powdered sugar, one cup or so at a time, beating well on medium speed. Scrape sides and bottom of bowl often.
- Gradually add milk; beat at medium speed until light and fluffy. Add additional milk if needed to reach desired consistency.
I frosted the top part of the cake with white frosting and then used a can of Wilton’s blue color mist spray to give the sky the look I wanted. I divided the rest of the frosting and colored it yellow, brown, and gray. I used gray to frost the lower part of the tree and trunk and then used brown to draw a basic stable outline and manger. I used yellow to make straw and write the birthday message. I also used yellow to add stars to the sky and as a border around the cake.
For the large star on top, I melted a small amount of yellow chocolate and dipped one of the cut out stars in it and let it dry and set. After the chocolate star was dry, I attached it to the top of the cake with a little extra frosting and then drew a few yellow lines coming from the star. As a final touch, I added the scripture from Isaiah 9:6 in sharpie at the bottom of the cake board.
The decorated cake was used as the table centerpiece for the party and to serve the parents and teachers. The kids all received their own egg-free, gluten-free, dye-free Star of the East for their treat. The birthday party was a huge success, and the kids enjoyed their stars very much. Happy Birthday, Jesus! 
Share This:
Looks really cute!! I am sure the children were thrilled!!
Yes, it was a big hit.
Pingback: Jesus Birthday Cakes for Christmas