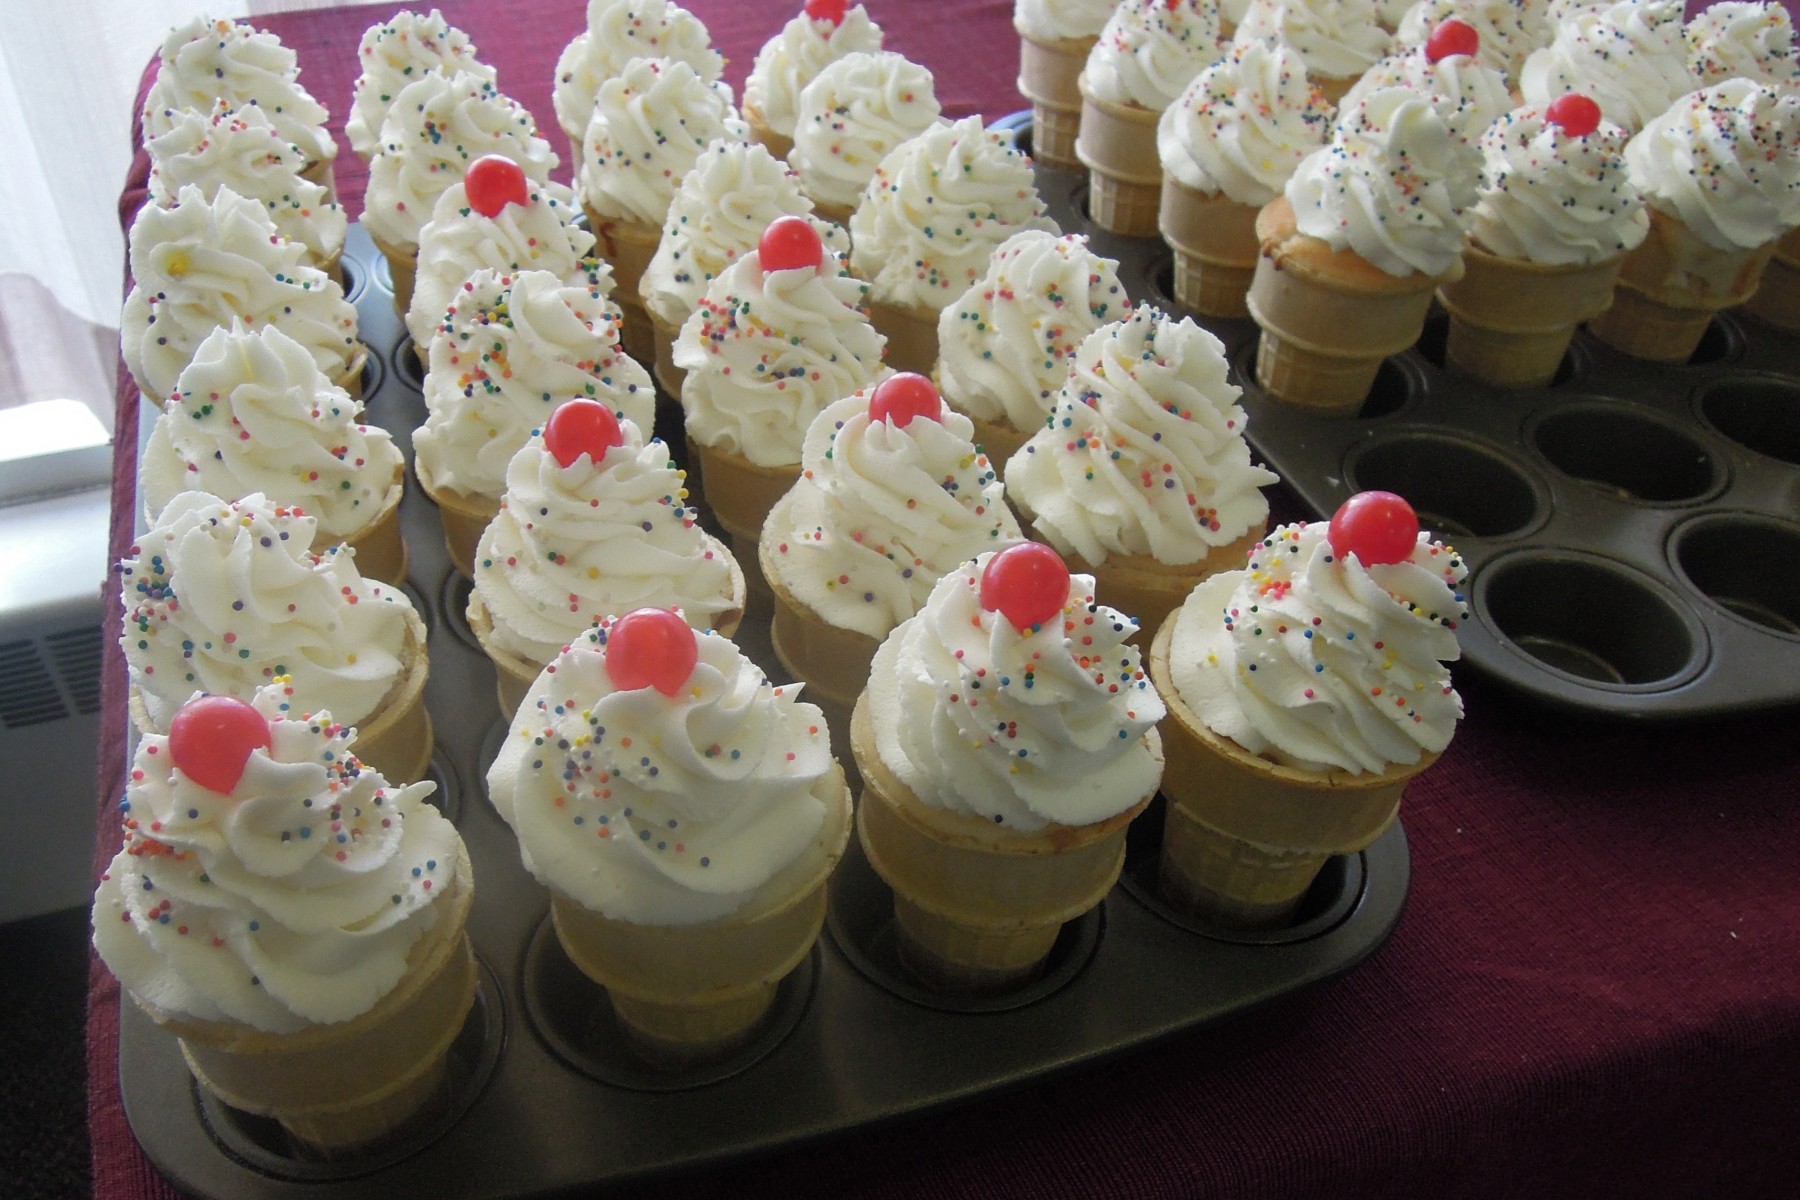
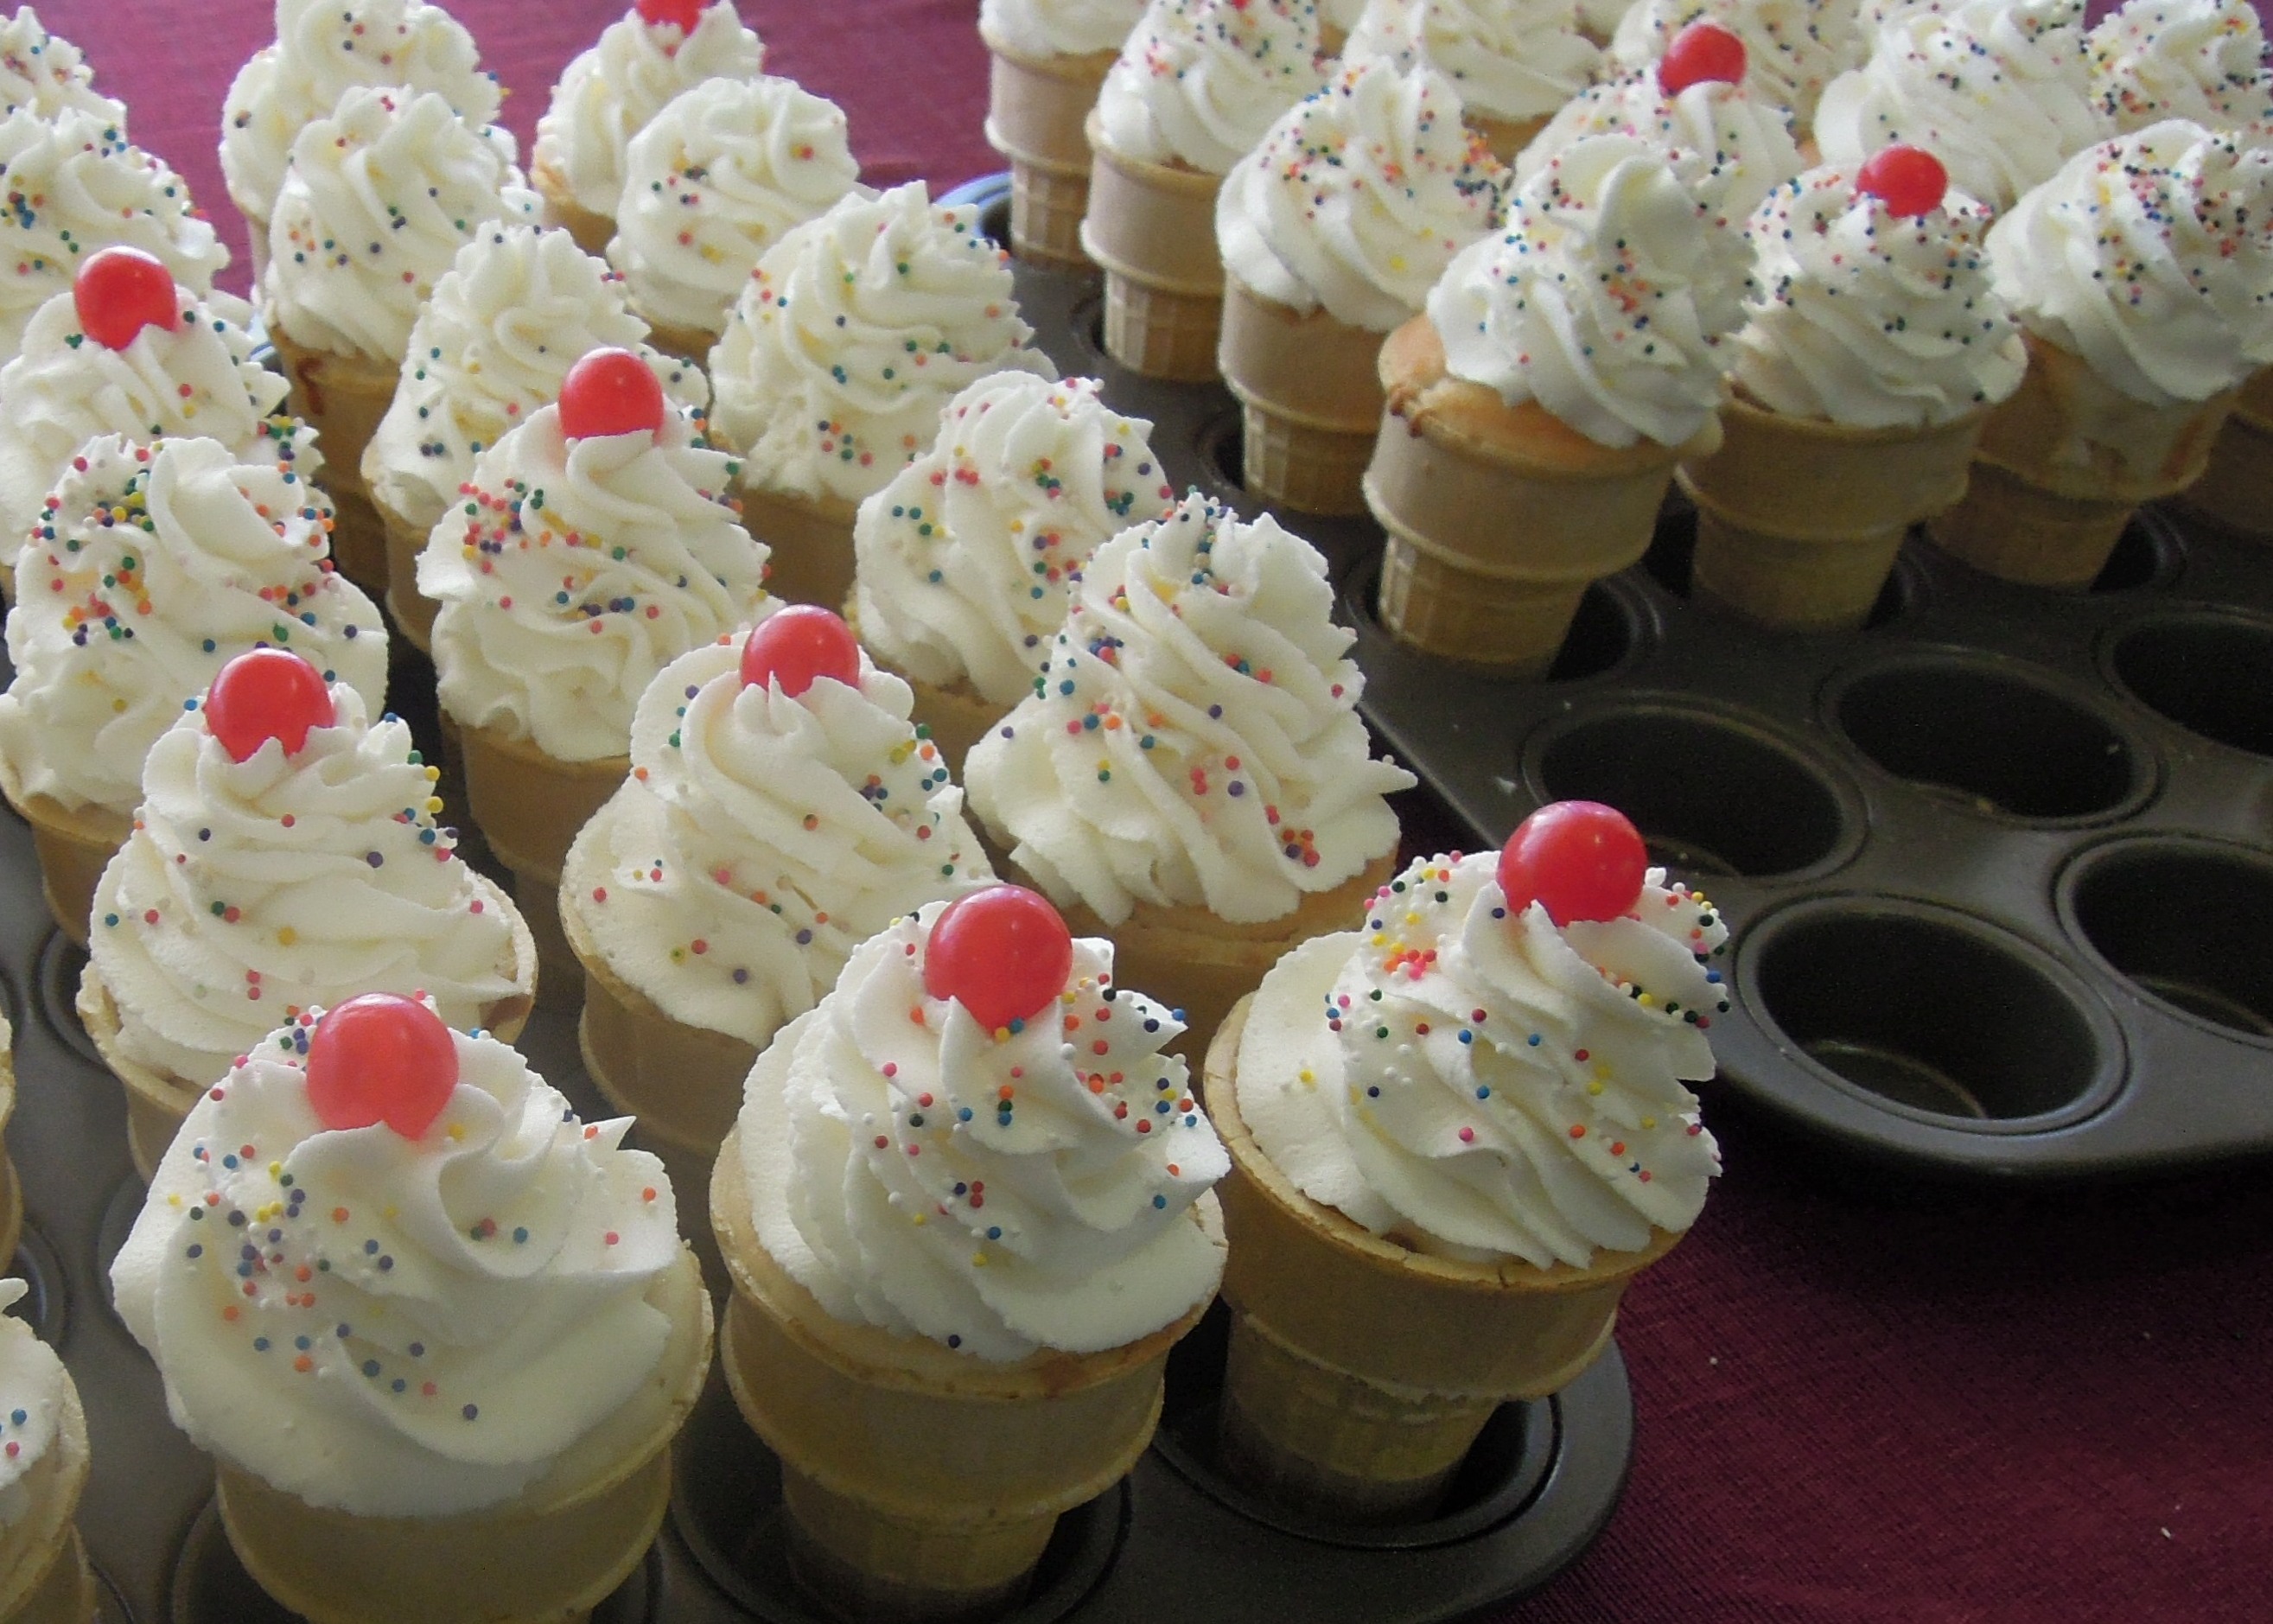
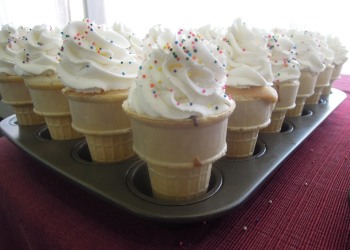
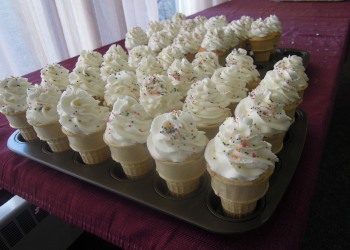
 Did the picture make you do a doubletake? When I made these for a church function, many people came over just to see how and why the ice cream wasn’t melting. There’s no ice cream. When I told them the top is frosting, most of the adults kind of groaned and walked away–too much sugar–and most of the kids got a grin from ear to ear as they grabbed a cone. The cuteness factor here is irresistible.
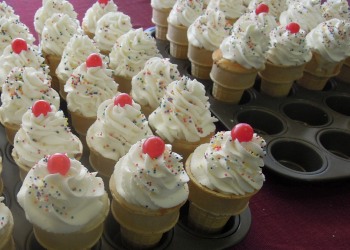
Of course you can change these up in many different ways: chocolate cake and chocolate frosting for chocolate ice cream, pink for strawberry, swirl, etc. I did white cake and white frosting for this bake. I added a sour cherry ball candy to some to give the appearance of a cherry on top. They were adorable and a big hit with the kids. These are perfect for a summertime dessert.

Ice Cream Cone Cupcakes
Ingredients:
- cake type, flat-bottom ice cream cones (You will get more cones from the recipe than you get regular-size cupcakes because each cone does not hold a lot of batter. Be sure to buy enough cones.)
- your favorite cake recipe or box cake mix and ingredients to make
- frosting–homemade or canned OR whipped cream (These take a lot of frosting…)
- sprinkles, sour cherry balls, or other candies for decoration
Directions:
- Preheat oven to 350 degrees. Make your cake batter.
- Set your ice cream cones in a mini muffin pan. Fill them about 1/2-2/3 full with batter. If you overfill, your cake will spill out of the top of the cone.
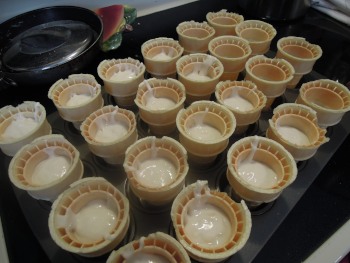
Fill batter below the line in the cone. 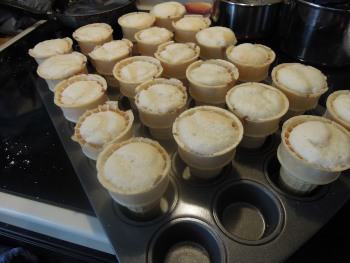
The batter will rise and be in just the right place for the “ice cream.” - Bake for 20-30 minutes or until a toothpick comes out clean. I found these to take longer than regular cupcakes to get fully done inside.
- Let cupcakes cool and then frost and decorate to look like an ice cream cone. You can use frosting or whipped cream.
*The cones have a tendency to get a little soggy. I have recently read a tip to poke a hole or two in the bottom of the cone prior to baking to allow steam to escape and reduce sogginess, but I have not had a chance to try it yet.
*Transporting these is tricky because they are so top-heavy. I transported the cones unfrosted and frosted them at the venue. If you need to transport them frosted, the best tip I found is to get a lidded box that is about the depth of the cone and cut circles in the lid that are adequately spaced. Drop the cones into the circles and transport carefully.
Share This: